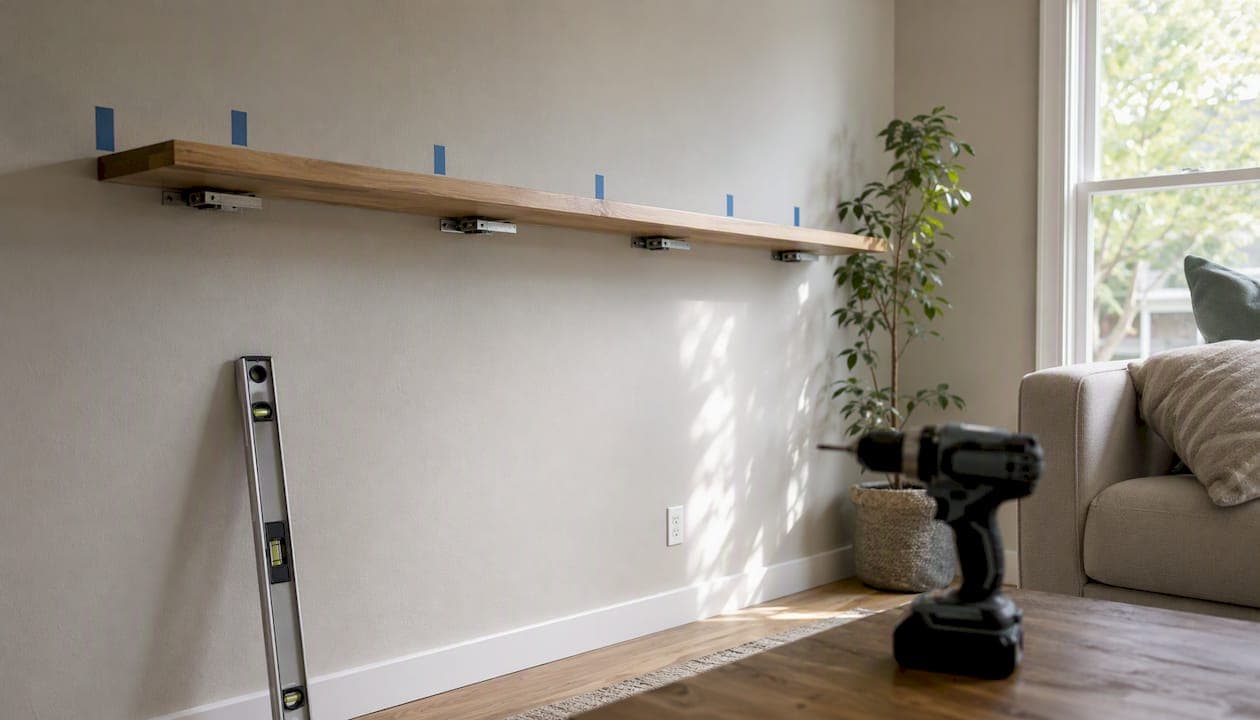
For most homes, three mounting systems cover nearly every situation: stud-mounted concealed floating brackets for a clean look, French cleats for heavy or long spans, and heavy-duty L/angle brackets when you need simplicity and strength without the fuss. Before anything else, one rule applies to all three: hit a wall stud—rated anchors are only for light loads under 20 lbs per anchor. Always plan for at least three times the weight you expect to put on the shelf.
Best-for quick picks:
- Stud-mounted floating brackets — light-to-medium display shelves, bedrooms, living rooms; hardware stays invisible
- French cleat — heavy storage, long kitchen shelves, workshop walls; distributes load across a wide run of studs
- Heavy-duty L/angle brackets — deep shelves, garage storage, laundry rooms; fast install, visible hardware, high capacity
Safety caveat: Drywall alone cannot hold a loaded shelf reliably. Lowe's installation guide is explicit: locate studs first, and treat drywall-only fixes as a last resort with rated hollow-wall anchors. Use a 3× safety margin on every load estimate — if you plan to store 30 lbs, design the mount to hold 90 lbs. This rule applies only when mounting into studs or blocking; do not rely on drywall anchors for heavy or regularly loaded shelves.
Key Takeaways
The safest top shelf mounting starts with the wall, not the bracket: identify your wall type and stud locations before buying any hardware, and design for at least three times the expected load.
| Point | Details |
|---|---|
| Choose method by load and look | Floating brackets for clean aesthetics, French cleat for heavy/long spans, L/angle brackets for fast high-capacity installs. |
| Per-stud capacity rule | One stud connection holds roughly 45–50 lbs; two studs 90–100 lbs; three studs 135–150 lbs; blocking can push capacity above 200 lbs. |
| 3× safety margin | Always design the mount to hold three times the intended load to account for dynamic forces and future weight creep. |
| Match anchor to wall type | Lag screws into studs for wood framing; rated toggle bolts for hollow drywall; sleeve or wedge anchors for masonry. |
| Honestbuilders for complex installs | For long spans, unknown wall construction, or shelves above high-traffic areas, Honestbuilders provides fixed-price professional installation with load testing. |
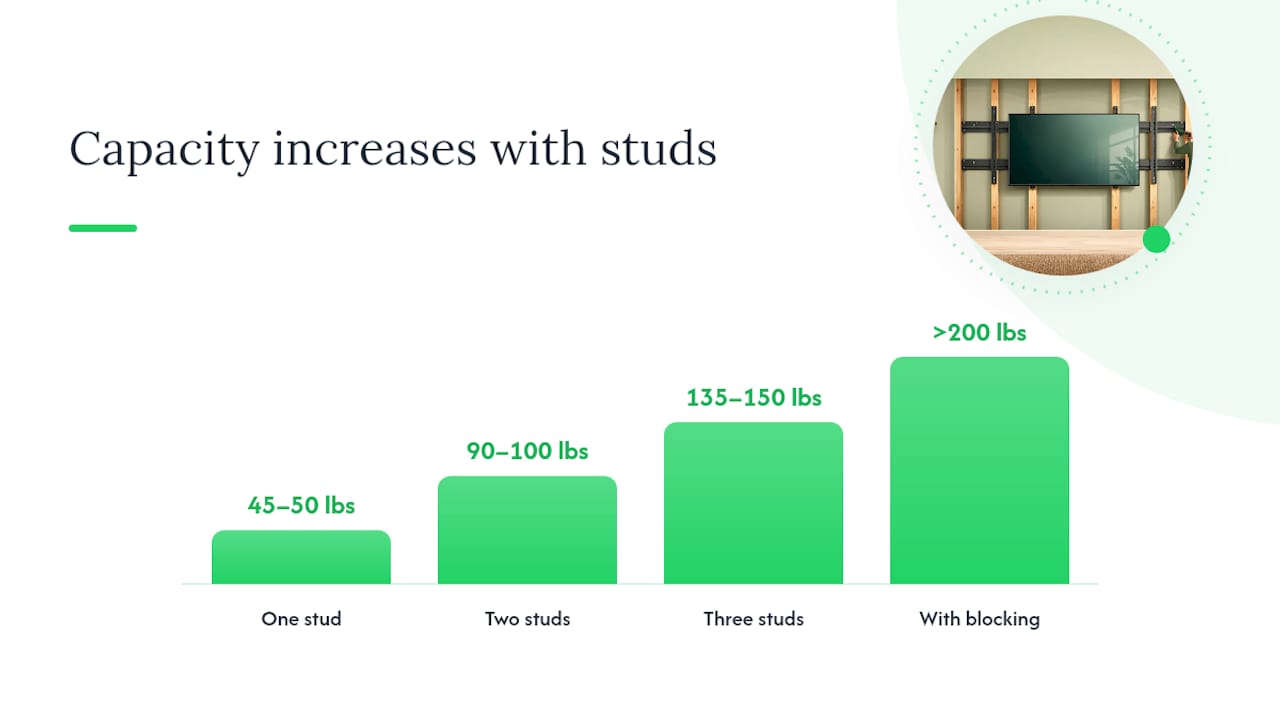
Table of Contents
- What mounting system should you use for a top shelf?
- How do wall type and load determine your anchor choice?
- How do shelf materials and reinforcement affect load capacity?
- What tools and materials do you need before you start?
- Step-by-step installation for the three most common methods
- What mistakes do DIYers make most often when mounting top shelves?
- Where should you place top shelves in each room?
- Are there good mounting options that don't require drilling?
- Anchor and fastener load-capacity cheat sheet
- When does DIY make sense, and when should you hire a pro?
- Honestbuilders handles the installs you'd rather not guess on
- What the conventional wisdom on shelf mounting gets wrong
- Sources
What mounting system should you use for a top shelf?
The six main systems each solve a different problem. Knowing how each one carries load and what it looks like on the wall is the fastest way to narrow your choice.
Concealed floating brackets
A steel rod or bracket slides into a pre-drilled channel in the back of the shelf. From the front, the shelf appears to float. Load transfers through the rod into the wall, so the bracket must reach a stud or solid blocking. This is the go-to for bedrooms, living rooms, and anywhere aesthetics matter. Depth is limited by rod length, typically 8–12 inches for standard kits.
Face-mounted L/angle brackets
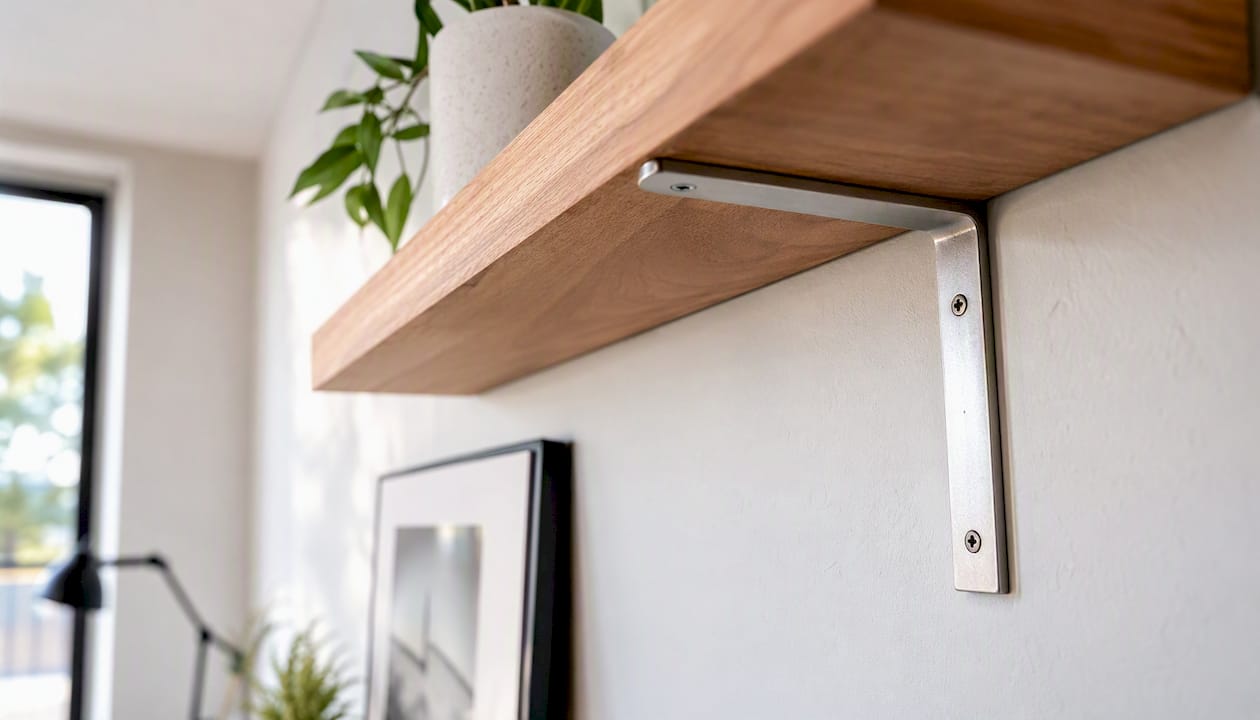
Visible steel or iron brackets screw directly into the wall and support the shelf from below. They're faster to install than concealed systems and can handle more weight per bracket because the screw pattern is straightforward. The trade-off is hardware visibility. For a kitchen or garage, that's rarely a problem. For a styled living room, it can feel industrial unless you choose a decorative bracket.
French cleat
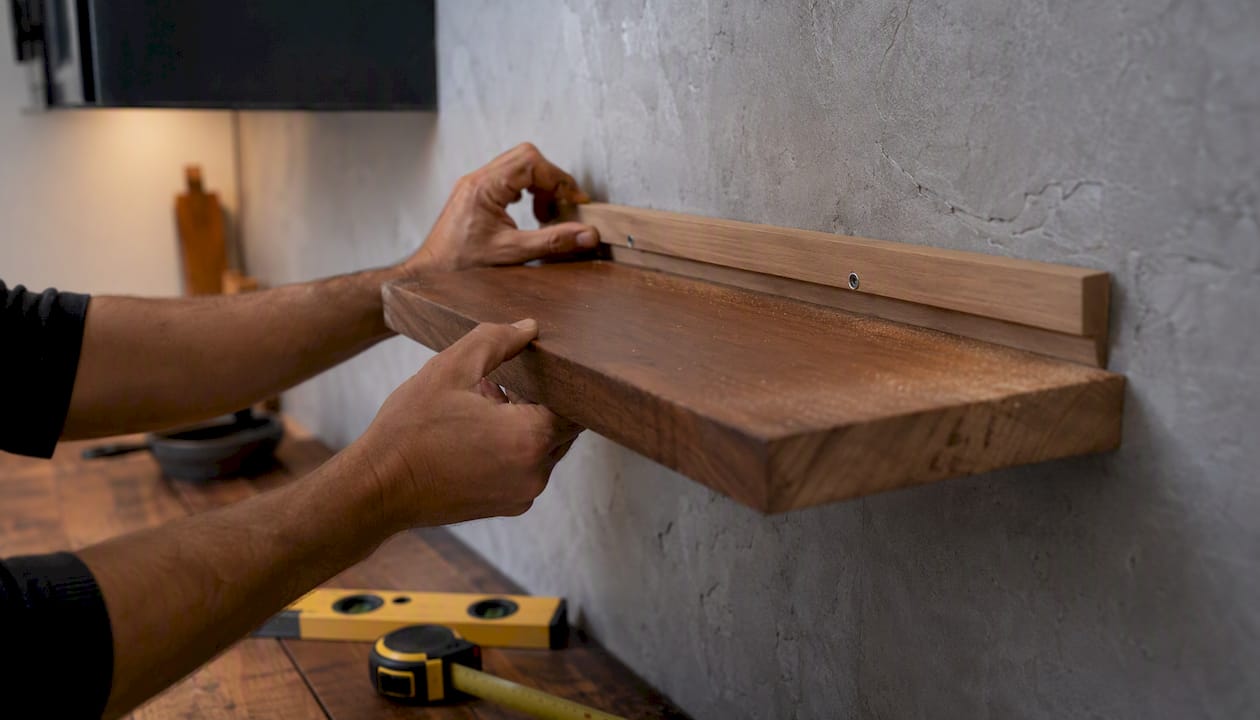
A French cleat is a pair of beveled boards: one screwed to the wall, one attached to the shelf. The shelf hooks over the wall piece and gravity locks it in place. Because the wall cleat can span multiple studs, load distribution is excellent for long, heavy shelves. It's also the most adjustable system — slide the shelf left or right without re-drilling. Modular wall-mounted systems use a similar principle, trading wood cleats for metal wall plates that allow full reconfiguration later.
Shelf pins and standards
Shelf pins fit into pre-drilled holes in a cabinet or bookcase side panel. Standards are metal tracks screwed to the wall with pin clips that slot in at any height. Both systems are best for enclosed furniture or built-in shelving where you want adjustable shelf heights. For a top shelf in open wall space, standards work well but the vertical tracks are visible.
Cleats and ledger boards
A horizontal wood ledger screwed directly into studs acts as a shelf support from below. Common in kitchen cabinet installations and pantry builds. Paired with a front lip or face frame, the ledger disappears. This method works best for full-width built-ins rather than individual floating shelves.
TV and AV top shelves
These are purpose-built floating platforms for electronics. The Kanto AVT1 tempered glass AV shelf, for example, carries 20 lbs and includes cable-management covers. That capacity is fine for a streaming device and remote, not for books or heavy decor. If you're mounting above a TV, check the product's rated capacity before loading it with anything heavier than light accessories.
How do wall type and load determine your anchor choice?
The wall behind your shelf decides almost everything about which fastener will work. Getting this wrong is the most common reason shelves fail.
| Wall type | Recommended anchor/method | Key notes |
|---|---|---|
| Wood studs (standard drywall) | Lag screws or #10 wood screws into studs | Most reliable; aim for 1.5" minimum penetration into stud |
| Hollow drywall (no stud) | Rated toggle bolt or Toggler snap toggle | Use only for light loads under 20 lbs per anchor |
| Plaster over wood lath | Wood screws into lath or studs; avoid standard toggles | Plaster cracks easily; drill slowly, use a sharp bit |
| Masonry/concrete | Sleeve anchors or wedge anchors with hammer drill | Pre-drill with carbide masonry bit; use anchor rated for shear load |
| Metal studs | Through-bolt with backing plate or add wood blocking | Metal studs alone have poor pull-out strength for shelf loads |
Checklist flow:
- Estimate the total load: shelf weight plus everything you plan to store, multiplied by three.
- Identify wall type: tap the wall (hollow sound = no stud nearby), use a stud finder, and check if it's plaster or drywall.
- Match anchor to wall: studs first, rated hollow-wall anchors second, masonry anchors for concrete or brick.
- Add blocking when studs don't align with your bracket holes.
Shelfology's load guidance puts the per-stud rule of thumb at roughly 45–50 lbs for one stud connection, 90–100 lbs for two studs, and 135–150 lbs for three. With blocking added behind the drywall, you can exceed 200 lbs. If your shelf needs to hold more than two studs can offer and you can't add blocking yourself, that's a strong signal to bring in a professional.
When bracket holes don't line up with studs, Shelfology recommends drilling custom holes in the bracket itself so every fastener lands in solid wood rather than drywall. It's a simple fix that most homeowners skip — and then wonder why the shelf shifted six months later.
How do shelf materials and reinforcement affect load capacity?
The bracket and anchor carry the load, but the shelf itself can become the weak link if the material isn't matched to the span and weight.
Common shelf materials and practical limits:
- Solid hardwood (oak, maple, walnut): Strongest option for long spans. A 1.5"-thick hardwood board can span 36–48 inches without visible sag under moderate loads. Best for kitchen and living room shelves where aesthetics and strength both matter.
- Plywood (3/4" minimum): Nearly as strong as solid wood, more dimensionally stable, and less prone to warping. A good choice for painted shelves or workshop storage. Avoid anything thinner than 3/4" for spans over 24 inches.
- MDF: Looks clean when painted, but sags under sustained load faster than plywood. It is generally advised to keep MDF spans short and loads light when using it as shelving material. It's also heavy for its strength, which adds to the bracket load.
- Tempered glass: Visually striking but limited in span. Most residential glass shelves are rated for 24-inch spans at modest loads. Never exceed the manufacturer's stated capacity.
Pro Tip: For a shelf longer than 36 inches carrying real weight, add a center bracket or support. A single bracket at each end creates a lever-arm effect at mid-span that the material alone can't resist.
Reinforcement options that actually work
Blocking is the single most effective reinforcement for top shelves. A horizontal 2×4 or 2×6 screwed between studs behind the drywall gives every bracket screw a solid wood target, regardless of stud spacing. Shelfology's guide identifies blocking as the most reliable DIY reinforcement for heavy or long shelves.
Embedded steel rod runs inside a hollow shelf blank and resists mid-span deflection. Some commercial floating shelf kits include this. For a custom build, a 1/2" steel rod glued into a routed channel adds significant stiffness without changing the shelf's appearance.
Full backplate mounting screws a plywood or steel plate to the wall across multiple studs, then attaches the shelf to the plate. This spreads load across the widest possible area and is the right call for masonry walls where anchor spacing is limited.
When thicker material alone isn't enough — say, a 48-inch shelf holding a full row of hardcover books — the answer is almost always a center bracket plus blocking, not just upgrading from 3/4" to 1.5" material. The span is the problem, not the thickness.
What tools and materials do you need before you start?
Arriving at the job with the wrong bit or no level costs more time than the install itself. Here's what to gather before you touch the wall.
Essential tools:
- Stud finder (magnetic or electronic)
- 4-foot level or laser level
- Drill/driver with clutch
- Drill bits: standard twist bits, cobalt bit for metal brackets, masonry bit if needed
- Torque-rated socket or wrench for lag screws
- Tape measure and pencil
- A second person for shelves above shoulder height
Fasteners by method:
- Studs: #10 × 3" wood screws or 3/8" × 3" lag screws for heavy brackets
- Hollow drywall: 1/4"-20 toggle bolts or Toggler snap toggles rated for your load
- Masonry: 3/8" sleeve anchors or wedge anchors, minimum 1.5" embedment
- French cleat: 2.5" or 3" construction screws into studs at 16" spacing
Shelf Expression's floating shelf kits include matched brackets, correct-length screws, and a cobalt drill bit specifically sized for the bracket material. Buying a matched kit reduces the chance of mismatched components — a cobalt bit drills through aluminum brackets cleanly where a standard twist bit can wander and damage the bracket hole.
Pre-install checks:
- Locate all studs in the mounting zone and mark them with tape
- Scan for hidden electrical, plumbing, and HVAC with a multi-scanner before drilling
- Confirm the shelf's finished weight plus intended load, then multiply by three
- Mark a level line at the desired height before picking up the drill
- Wear safety glasses when drilling overhead
Pro Tip: For shelves above 6 feet, use a laser level instead of a bubble level. At that height, even a 1/8" slope is visible from across the room.
The Woodworker Express shelf hardware guide reinforces the stud-first preference: drive screws into studs wherever possible, and match anchor type to both wall material and shelf weight. Buying the cheapest toggle bolt at the hardware store and hoping for the best is how shelves end up on the floor.
Step-by-step installation for the three most common methods
Floating bracket (concealed rod system)
- Mark stud locations across the mounting zone with painter's tape.
- Hold the backplate against the wall, align holes to studs, and mark drill points with a pencil.
- Drill pilot holes slightly smaller than your screw diameter — typically 1/8" for #10 screws.
- Drive screws through the backplate into studs. For lag screws, use a socket wrench and stop when snug; overtightening strips the stud.
- Slide the shelf onto the rods and tighten the set screw (usually a 3mm or 4mm Allen key) until the shelf is locked and doesn't rotate.
- Check level. If the shelf tilts, loosen the set screw, adjust, and re-tighten.
- Test: press down firmly at the shelf's outer edge with your full body weight. No movement means a solid install.
The Home Depot hidden bracket installation video shows the backplate alignment and slot-and-slide sequence clearly — worth watching once before you start if this is your first concealed-bracket install.
CenterPointe's installation instructions note that rated capacity applies only when the shelf is mounted into wood studs. Drywall-only installs void the stated capacity.
L/angle bracket
- Mark the desired shelf height and draw a level line across the wall.
- Position the first bracket at a stud location, mark screw holes, and drill pilots.
- Screw the bracket to the wall, driving into the stud. Repeat for remaining brackets, spacing them no more than 16 inches apart for heavy loads.
- Lay the shelf on the brackets and check level.
- Drive screws up through the bracket's shelf flange into the shelf board from below.
- Test by pressing down at mid-span and at each end.
Pro Tip: For a heavy shelf, use three brackets rather than two — the middle bracket cuts mid-span deflection roughly in half.
French cleat
- Rip a 3/4" plywood board to 4–6 inches wide and cut a 45-degree bevel along one long edge.
- Screw the wall piece (bevel facing up and out) into studs across the full shelf width, using 2.5"–3" screws at every stud.
- Attach the matching piece (bevel facing down and in) to the back of the shelf.
- Hook the shelf cleat over the wall cleat. The interlocking bevels lock under load.
- Verify level and slide the shelf to the desired position.
- For a permanent install, add a small screw through the shelf cleat into the wall cleat to prevent lateral movement.
For kitchen cabinet installations that share the same blocking and stud principles, the cabinet installation walkthrough at Cabinet Specialist covers fastener patterns and blocking placement in useful detail.
Safety-testing checklist
After any install:
- Apply static pressure at the outer edge and mid-span for 30 seconds.
- Load the shelf gradually: start at 25% of the intended load, check for movement, then increase to 50%, then full load.
- Inspect the wall around each anchor point for cracking, bulging, or anchor pull-back.
- Return after 24 hours and re-check level. Slight settling is normal; visible tilt is not.
What mistakes do DIYers make most often when mounting top shelves?
Most shelf failures trace back to one of four errors. Knowing them ahead of time is faster than fixing them after.
Relying on drywall anchors for real loads. Standard plastic expansion anchors are rated for light picture frames, not shelves. A 30-lb shelf loaded with books can pull a plastic anchor through drywall in weeks. Use toggle bolts rated for the load, or better, find the stud.
Screws that are too short. A 1" screw through 1/2" drywall leaves only 1/2" in the stud — nowhere near enough. For stud mounting, use screws long enough to penetrate at least 1.5 inches into solid wood after passing through the drywall and bracket.
Too few fasteners. Two screws per bracket is the minimum. For heavy shelves or long spans, three screws per bracket into a stud or blocking is more reliable. Spacing brackets more than 24 inches apart on a loaded shelf creates a lever arm the material can't handle.
Ignoring level. A shelf that's 1/4" out of level over 36 inches looks fine empty. Load it with books and the visual tilt becomes obvious. Always check level before tightening the final screw.
When to stop and call a professional:
- Visible wall cracking around anchor points after loading
- Anchors that spin or pull back when you apply pressure
- Multiple fastener holes in the same stud from previous installs (the wood is compromised)
- Unknown wall construction — older homes may have plaster over metal lath, balloon framing, or non-standard stud spacing
- Any shelf above a bed, sofa, or high-traffic area where a fall could injure someone
For bathroom shelf installs specifically, moisture-resistant mounting practices matter as much as load capacity. The Honestbuilders bathroom accessories installation guide covers wet-room fastener choices and backing requirements in detail.
Where should you place top shelves in each room?
Height and depth rules vary by room because the function and the hazard are different in each space.
Kitchen: Mount shelves 18–24 inches above the countertop. Any higher and reaching for everyday items becomes awkward. Any lower and you lose usable counter space. Depth should stay at 10–12 inches so items don't hang over the counter edge.
Above a sofa: The standard is 10–12 inches above the top of the sofa cushion. That keeps decor visible without creating a head-strike hazard. Keep depth to 8–10 inches — a deep shelf above a seating area is a safety concern if it ever fails.
Hallway and entryway: Eye-line height (roughly 60–66 inches from the floor) works for display. Above coat hooks, 72–80 inches is common for bags and seasonal items. Keep depth shallow (6–8 inches) so the shelf doesn't narrow the passage.
Above a TV: Leave at least 4–6 inches of clearance between the top of the TV and the shelf bottom for heat ventilation. A shelf that sits directly on top of a TV traps heat and shortens the electronics' lifespan. AV-specific floating shelves are often designed with cable routing and appropriate clearances in mind.
Stacking multiple shelves: Space shelves at least 12 inches apart for books, 8–10 inches for small decor. For top shelves specifically, the gap between the highest shelf and the ceiling should be at least 6 inches — both for visual breathing room and so you can actually reach what's stored there.
Aesthetic choices for top shelves:
- Concealed brackets read as modern and minimal; they work best when the shelf itself is the visual feature.
- Visible iron or steel brackets add an industrial or farmhouse character; they're honest about how the shelf works.
- Finish the bracket in the same tone as the shelf for a cohesive look, or contrast deliberately (black bracket on light wood) for visual definition.
- For a feature wall renovation, floating shelves at staggered heights create depth without requiring built-in cabinetry.
Modular wall systems offer the most flexibility here: wall plates allow you to reposition shelves without re-drilling, which matters if you're still deciding on the final layout.
Are there good mounting options that don't require drilling?
Yes, with clear limits. Non-drill options work for light decor and temporary setups. They're not appropriate for anything heavy, permanent, or above a high-traffic area.
Adhesive systems: Heavy-duty adhesive strips (like 3M Command's larger load-rated strips) can hold small shelves up to roughly 7.5 lbs on smooth painted drywall. That's enough for a small plant, a few small frames, or a soap dish. Not enough for books, kitchen supplies, or anything you'd be upset to see on the floor.
Tension poles and compression shelving: Freestanding tension poles wedge between floor and ceiling and support horizontal shelf boards. They're genuinely useful in rental apartments where drilling is prohibited. Load capacity varies by product but is typically adequate for light storage. The limitation is stability — a hard bump can shift the whole unit.
Over-door and over-TV shelves: These hook over the top of a door frame or TV cabinet and require no wall contact at all. Capacity is low (typically under 15 lbs) and they're best for remotes, small accessories, or lightweight decor.
Specialty no-drill brackets: Some systems use a friction-fit or clamp mechanism against window frames, door frames, or furniture. Useful in very specific situations; not a general-purpose solution.
The honest assessment: if you need a shelf that will hold anything heavier than light decor, or if the shelf is in a location where a fall would be dangerous, drilling is not optional. Adhesive and tension systems are convenience tools, not structural ones.
Anchor and fastener load-capacity cheat sheet
Use this as a buying guide at the hardware store. Every anchor type has a rated shear load (resistance to downward pull) and a pull-out load (resistance to the anchor being yanked straight out of the wall). For shelves, shear load is the number that matters most.
| Anchor type | Approximate shear capacity | Best wall type | Notes |
|---|---|---|---|
| Plastic expansion anchor | 10–25 lbs | Drywall (light use only) | Not for shelves with real loads |
| Toggle bolt (standard) | 50–100 lbs | Hollow drywall | Verify rated load on packaging |
| Snap toggle / Toggler | 80–150 lbs | Hollow drywall, plaster | Check product spec for exact rating |
| Molly bolt | 30–50 lbs | Hollow drywall | Better than plastic; still limited |
| Lag screw into stud | 100–200+ lbs per screw | Wood stud | Most reliable; 1.5" minimum penetration |
| Sleeve anchor (masonry) | 100–150 lbs | Concrete, brick | Use hammer drill; check embedment depth |
| Wedge anchor (masonry) | 200+ lbs | Concrete | For heavy permanent installs |
Per-stud capacity for floating shelves: roughly 45–50 lbs per stud connection, 90–100 lbs for two studs, 135–150 lbs for three. With blocking, capacity can exceed 200 lbs.
Safety margin rule: Design for at least 3× the expected live load. A shelf you plan to load with 40 lbs of books should be mounted to hold 120 lbs. This accounts for dynamic loads (someone leaning on the shelf), material fatigue, and the fact that shelves tend to accumulate more weight over time than originally planned. Only use this safety margin with stud or blocking mounting; hollow-wall anchors are not reliable for heavy or regularly loaded shelves.
Shopping checklist — what to verify on packaging:
- Rated shear load (not just pull-out load)
- Compatible wall types listed on the package
- Minimum screw length for the stated rating
- Whether the rating assumes drywall thickness (1/2" vs. 5/8")
CenterPointe's installation instructions make the point plainly: rated capacity applies only when the shelf is mounted into wood studs per the published instructions. Deviating from the install method voids the stated number.
When does DIY make sense, and when should you hire a pro?
Most single shelves under 36 inches, carrying under 50 lbs, on a standard wood-stud wall are well within DIY range. You need a stud finder, a level, a drill, and two hours. The furniture assembly step-by-step guide covers the tool list and preparation habits that apply equally to shelf installs.
The calculation changes when any of these are true: the wall construction is unknown, the span exceeds 48 inches, the load is above 75–100 lbs, or the shelf is above a bed or sofa where a failure could hurt someone. In those cases, the cost of getting it wrong — a shelf that pulls the wall apart, or worse, falls on someone — is higher than the cost of a professional install.
Three questions worth asking any hired installer: Do they have experience adding blocking or backing to walls before mounting? Do they carry liability insurance and offer a workmanship guarantee? Can they give you a fixed price before starting?
For complex installs, long heavy spans, or any situation where you're not confident about what's behind the wall, Honestbuilders handles the full job: stud location, blocking where needed, correct fasteners, and a finished install that's tested before the crew leaves.
Honestbuilders handles the installs you'd rather not guess on
Mounting a single light shelf on a known stud wall is a reasonable DIY project. Mounting a long kitchen shelf above a stove, a heavy display shelf above a sofa, or anything on an older plaster wall with unknown framing is a different job entirely — one where the wrong call costs more to fix than it would have cost to hire someone in the first place.

Honestbuilders provides on-site handyman and installation services for homeowners who want the job done right without the guesswork. The team handles stud location, blocking, correct anchor selection, and final load testing on every shelf install. No hidden charges, no vague quotes — you get a fixed price before work starts and a result you can actually put weight on.
If you're weighing a complex shelf install or a full wall shelving project, get a free quote from Honestbuilders via WhatsApp at +65 9447 9696.
What the conventional wisdom on shelf mounting gets wrong
Most DIY content treats shelf mounting as a hardware problem: buy the right anchor, follow the steps, done. The part that gets glossed over is that the wall itself is the variable nobody can predict from a YouTube video.
Standard stud spacing is 16 inches on center. Except when it's 24 inches. Except in older homes where it's irregular, or where a previous renovation added a non-load-bearing partition with metal studs, or where the "stud" your finder detected is actually a pipe chase. The anchor and bracket you chose for a textbook install can be completely wrong for the actual wall in front of you.
The 3× safety margin rule exists precisely because of this uncertainty. It's not conservative — it's realistic. A shelf rated at 50 lbs per stud that you've loaded to 48 lbs has no margin for the stud being slightly smaller than standard, the screw being slightly short, or the shelf accumulating an extra 10 lbs of stuff over the next year.
The other thing most guides understate: height changes the risk profile. A shelf at 48 inches that fails drops its contents on the floor. A shelf at 84 inches that fails drops its contents on whoever is standing below it. Top shelves deserve more scrutiny, not less, simply because of where they are.
DIY is genuinely the right call for most single-shelf installs on known walls. But the decision to DIY should be based on what you actually know about the wall, not on what a general guide assumes about it.
Sources
- How to install floating shelves — Lowe's
- The Ultimate Guide to Floating Shelves | Shelfology
- Floating Shelf Kits | Shelf Expression
- FLOATING SHELVES KIT INSTALLATION (CenterPointe) — VT Industries
- How to Install a Hidden Bracket Floating Shelf — The Home Depot (video)
- Ultimate Guide to Shelf Hardware — Woodworker Express
- Modern Shelving | Modern shelving for home, office and retail.