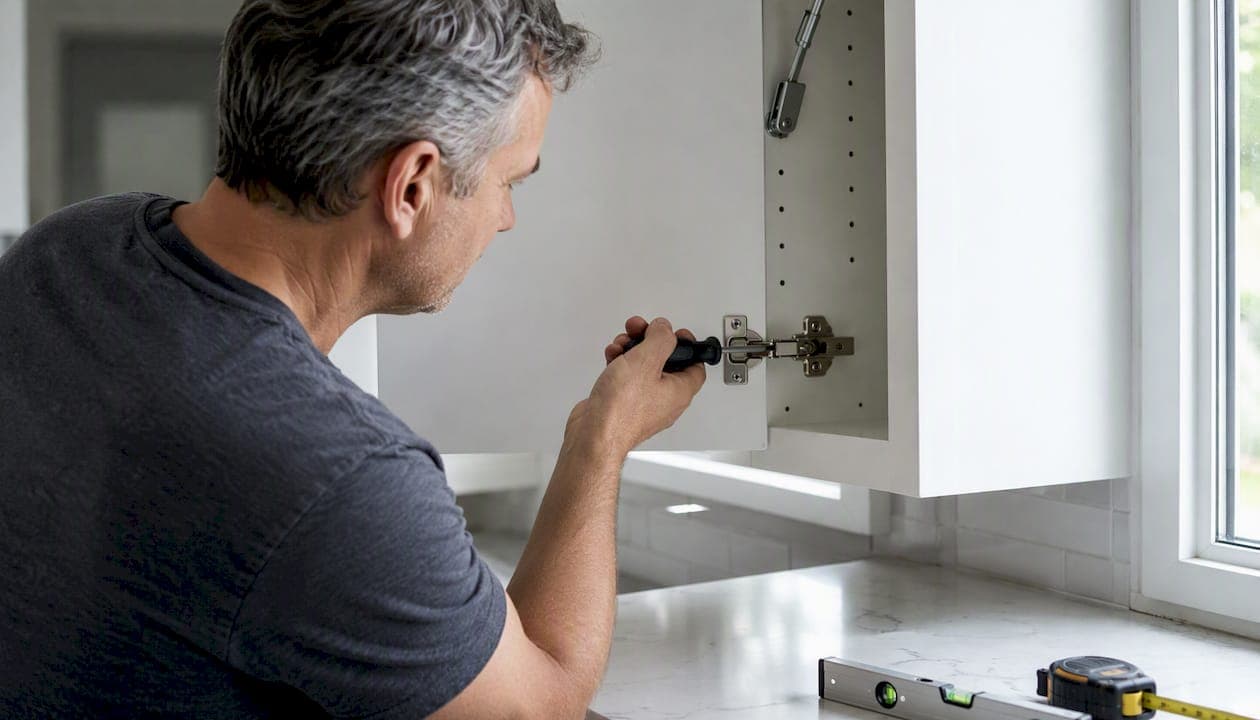
Most cabinet door misalignments can be fixed quickly, often within a short amount of time per door, and the fastest cabinet door alignment fix starts with one tool: a Phillips #2 screwdriver. Before touching any adjustment screws, tighten the four hinge mounting screws first (two on the door cup, two on the cabinet plate). That single step resolves a surprising number of crooked doors. If the door still sits wrong, work through depth, then side-to-side, then height adjustments on the hinge's three adjustment screws. Total cost for most repairs: $0 to $10 in hardware.
Quick start:
- Tighten all mounting screws (30 seconds per hinge)
- Adjust depth, then lateral, then height (quarter-turns at a time)
- Close and test after each small change
Key Takeaways
A cabinet door alignment fix almost always starts with tightening mounting screws first, then working through depth, lateral, and height adjustments in that exact order using a manual screwdriver.
| Point | Details |
|---|---|
| Tighten first | Check and tighten all four mounting screws before touching any adjustment screw. |
| Correct adjustment order | Work depth first, then lateral, then height to avoid chasing corrections. |
| Small turns only | Quarter-turn increments with a test after each prevents over-adjustment and stripped screws. |
| Stripped holes need repair | Use toothpicks plus glue for a quick fix, or dowel-plus-glue for a durable repair before reinstalling. |
| Honestbuilders for persistent issues | When structural problems or repeated failures appear, Honestbuilders offers professional handyman service. |
Table of Contents
- What tools and prep do you need before starting?
- How do you diagnose the exact misalignment?
- How do you adjust modern 3-way cabinet hinges step by step?
- What do you do when tightening isn't enough?
- How do you repair stripped screw holes?
- How do you fix a warped or bowed door?
- When should you stop DIY and call a pro?
- 6-step quick troubleshooting checklist
- What the hinge adjustment guides get wrong
- When the DIY fix is done but the problem keeps coming back
- Sources
What tools and prep do you need before starting?
You won't need much. Gather these before you open a single cabinet:
- Phillips #2 screwdriver (manual, not a drill)
- Small level or 6-inch ruler for measuring reveals
- Clamps (for stripped-hole repairs or warped doors)
- Wood glue, toothpicks, and wooden dowels (for stripped screw holes)
- Longer replacement screws (1.5–2 inch, same gauge as existing)
- Painter's tape to mark door position before adjusting
Empty the cabinet before you start. A loaded cabinet shifts the door's weight and throws off your alignment checks. If you need to remove a door entirely, support it with one hand or prop it on a folded towel on the countertop. Protect your counters and floors with a drop cloth if you're doing glue work.
Pro Tip: Before turning any screw, mark the hinge's current position with a small piece of painter's tape. If you over-adjust, you'll know exactly where to return.
Using a manual Phillips-head screwdriver instead of a drill is non-negotiable here. The small screws on modern hinges and the soft particleboard or MDF frames strip fast under power-tool torque. Once a hole is stripped, you've added 20 minutes to your repair.
How do you diagnose the exact misalignment?
Don't touch the adjustment screws until you know which axis is off. Fixing the wrong one first creates a new problem. Experts recommend checking three things before adjusting: planar flushness, height, and consistent reveal (the gap between the door and the frame or adjacent door).
Close the door and step back. Here's what each problem looks like:
Height (vertical): The top or bottom edge of the door doesn't line up with the adjacent door or the cabinet frame. One corner sits higher than the other.
Lateral (side-to-side): The gap on the left or right side of the door is uneven. The door may rub the frame on one side or leave a wide gap on the other.
Depth (flushness): The door face sticks out further than the adjacent door, or one side sits recessed. Run your hand across two neighboring doors; you'll feel the difference.
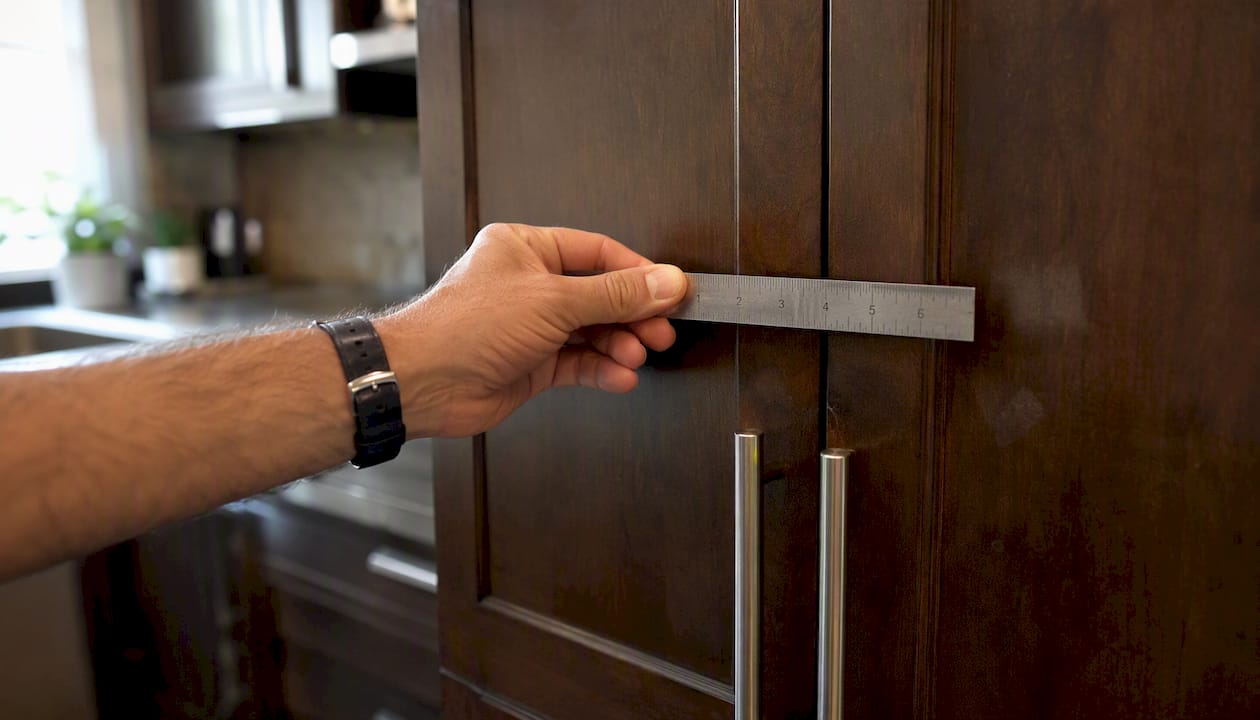
Warp: The door bows across its face. Hold a ruler flat against the door surface. A gap in the middle or at the edges confirms a warp rather than a hinge issue.
Use a 6-inch ruler to measure the reveal at the top, middle, and bottom of the door. Reveals should be consistent, typically 1/8 to 3/16 inch. Uneven readings tell you which direction to correct.
Pro Tip: If the door won't budge when you try height adjustments, the mounting plate screws may be under tension. Loosen them slightly first, make the height move, then re-tighten. Skipping this step is why most people think their hinges are broken when they're not.
Also check the hinge itself. Grab the door and gently push it toward and away from the cabinet. Any wobble at the hinge cup means the mounting screws are loose, not the adjustment screws. Tighten those first.
How do you adjust modern 3-way cabinet hinges step by step?
Modern European-style concealed hinges offer three-direction adjustability: depth, lateral, and height. Each direction has a dedicated screw. Work in this order to avoid chasing your own corrections.
Adjustment order:
- Secure all mounting screws (both hinges, all four screws)
- Adjust depth first
- Adjust lateral (side-to-side) second
- Adjust height last
- Test after every quarter-turn
Here's the screw map for a typical European concealed hinge:
| Screw location | What it moves | Clockwise effect |
|---|---|---|
| Mounting plate rear screw | Depth (in/out) | Door moves toward cabinet |
| Hinge arm side screw | Lateral (left/right) | Door moves right |
| Mounting plate slot screw | Height (up/down) | Door moves up |
Screw locations vary slightly by brand, so check your hinge arm. Most have a small embossed arrow or label. If yours has a soft-close mechanism, note that some soft-close hinges have a separate tension screw; consult the manufacturer's instructions before adjusting, since that screw affects closing speed, not alignment.
The technique: Turn each screw no more than a quarter-turn, then close the door and check. Small, iterative adjustments prevent the cycle of over-correcting in one direction and then the other. For height changes, adjust both the top and bottom hinges by the same amount, or the door will tilt.
For face-frame cabinets with older-style hinges, the adjustment range is narrower. You may need to loosen the hinge screws, physically reposition the hinge, and re-tighten. The same diagnostic logic applies; the execution is just less forgiving.
Pro Tip: Never use a power drill for hinge adjustments. The torque strips small screws in seconds, and damaged particleboard is harder to fix than the original misalignment.
Once the door closes evenly with consistent reveals on all sides, run through this before/after check:
- Reveals are even (top, bottom, sides)
- Door face is flush with adjacent doors
- Door closes without rubbing
- Soft-close engages smoothly (if applicable)
- No hinge wobble when you push the door gently
What do you do when tightening isn't enough?
Sometimes the screws tighten, the door looks right, and then it shifts again within a day. That's a hinge fatigue or mounting failure problem, not an adjustment problem.
A bent or fatigued hinge shows a visible kink in the arm, uneven spring tension, or a cup that no longer sits flush in the door bore. Hold the hinge open at 90 degrees and look down the arm. Any twist or deformation means the hinge needs replacement, not adjustment. Replacement hinges are inexpensive; matching the cup diameter (typically 35mm for European hinges) and the overlay type is the main task. If you're unsure which hinge to buy, a soft-close hinge guide can help you match the right type for your cabinet style.
If the hinge itself is fine but the door keeps drifting, the mounting screws may not be gripping. Two fixes work well here:
Longer screws: Swap the existing screws for 1.5-inch or 2-inch screws of the same gauge. Longer screws reach past the surface layer of particleboard into denser material underneath, giving the hinge a much firmer hold.
Shims: A thin cardboard or plastic shim behind the mounting plate can correct a hinge that sits at a slight angle due to an uneven cabinet surface. Cut the shim to match the plate size, drill pilot holes through it, and reinstall.
Add a third hinge: Tall doors (over 40 inches) or heavy doors sometimes need a center hinge. Adding one distributes the load and stops the door from racking over time.
How do you repair stripped screw holes?
A stripped hole means the screw spins without gripping. No amount of tightening will hold the hinge until you rebuild the wood. Toothpicks with glue work for a quick fix; dowel-plus-glue reinforcement is the stronger, longer-lasting repair.
Toothpick method (quick fix):
- Remove the hinge and clean out any loose wood fibers from the hole.
- Dip two or three toothpicks in wood glue and push them into the hole.
- Snap off the toothpicks flush with the surface.
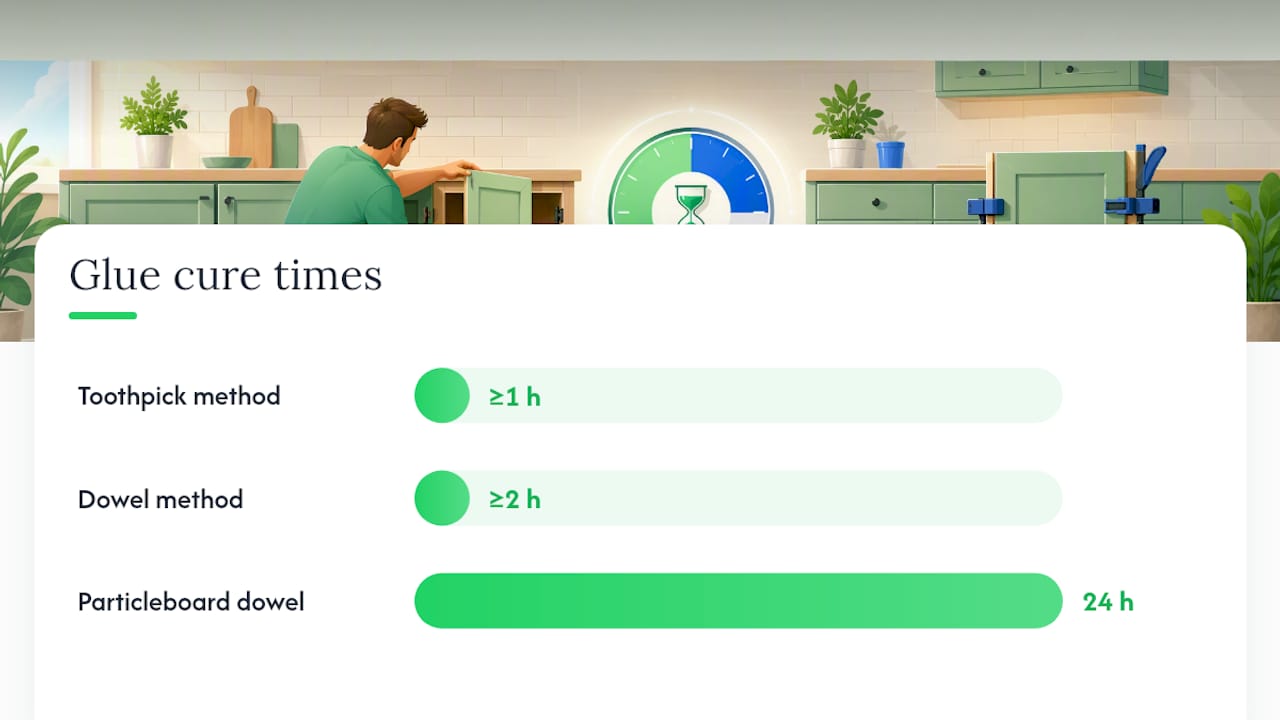
- Let the glue cure for at least one hour (overnight is better).
- Drive the original screw back in slowly. The toothpicks give the threads something to bite.
Dowel method (durable fix):
- Drill out the stripped hole with a bit matching your dowel diameter (typically 1/4 inch).
- Cut a wooden dowel to the hole depth, coat it in wood glue, and tap it in flush.
- Clamp if possible and allow full cure time (minimum 2 hours, 24 hours for particleboard).
- Drill a pilot hole through the center of the dowel, slightly smaller than your screw diameter.
- Reinstall the hinge and drive the screw in by hand.
For particleboard that has stripped repeatedly, threaded inserts (also called barrel nuts or furniture inserts) provide the most permanent fix. Drill to the insert's specified diameter, thread it in with a hex key, and the hinge screw threads into metal rather than wood.
Test the repair before closing the door: the screw should feel firm resistance within the first two turns. If it spins freely again, the hole needs the dowel treatment rather than toothpicks.
How do you fix a warped or bowed door?
Warping is a different problem from hinge misalignment, and hinge tweaks won't fix it. A door that bows across its face needs the warp addressed directly.
First, assess severity. Lay a straightedge across the door face. A gap under 1/4 inch is mild and may respond to the clamp method. A gap over 1/2 inch, or any delamination of the veneer or MDF layers, usually means replacement is the better call.
Clamp-and-heat method (mild warps):
Remove the door from the cabinet. Lay it on a flat surface, bowed side up. Apply gentle heat with a hairdryer or heat gun on its lowest setting, moving constantly to avoid scorching the finish. Once the wood feels slightly warm to the touch, clamp it flat against a straight board or workbench. Use cauls (scrap wood pieces) between the clamps and the door face to distribute pressure evenly.
Leave it clamped for 24–48 hours in a dry environment. Humidity is usually what caused the warp, so a dry room helps the wood reset.
Pro Tip: Always place a thin cloth between the heat source and any veneer or painted finish. Direct heat delaminates veneer quickly, turning a fixable warp into a replacement job.
When to replace: if the door has swollen at the edges, the veneer is bubbling, or the warp returns within a week of clamping, replacement is the right move. Measuring for a new door is straightforward; a DIY door measurement guide walks through overlay, inset, and sizing so you order the correct replacement.
When should you stop DIY and call a pro?
Most cabinet door fixes are genuinely DIY-friendly. A few situations aren't.
Call a pro when you see:
- The cabinet box itself is moving or pulling away from the wall
- Multiple doors across the same run are misaligned (suggests the cabinet is no longer level or plumb)
- Screw holes strip again within days of repair, repeatedly
- The hinge mortise in the door face is cracked or the bore hole is damaged
- Water damage or rot in the cabinet frame
DIY time for a typical fix runs 15–30 minutes per door once you have the right tools. A professional handyman can usually address a full kitchen's worth of cabinet doors in a single visit, which makes sense when you're dealing with more than three or four problem doors or when the underlying structure needs attention.
Rough cost for professional cabinet door adjustment in the U.S. ranges from $75 to $200 for a service call covering multiple doors, depending on your region and the extent of the work. Structural cabinet repairs or full replacements run higher. For homeowners who've already tried the DIY steps and the problem keeps coming back, a handyman visit is often the faster path to a durable fix.
6-step quick troubleshooting checklist
Run through these in order. Most doors are fixed by step 3.
- Inspect (2 minutes): Close the door and identify the misalignment type: height, lateral, depth, or warp. Measure reveals with a ruler.
- Tighten mounting screws (2 minutes): Tighten all four mounting screws on each hinge. Test the door. Success: door closes evenly and gaps are consistent.
- Adjust depth (5 minutes): Turn the depth screw in quarter-turns, testing after each. Success: door face is flush with adjacent doors.
- Adjust lateral (5 minutes): Turn the side screw in quarter-turns. Success: gaps are even on both sides.
- Adjust height (5 minutes): Loosen mounting plate screws slightly, turn height screw, re-tighten. Adjust both hinges equally. Success: top and bottom edges align with neighboring doors.
- Final test (2 minutes): Open and close the door several times. Check all reveals, confirm no rubbing, and verify soft-close engages if present.
Total time for a straightforward fix: under 20 minutes. If you reach step 6 and the door still isn't right, the issue is likely a stripped hole, a fatigued hinge, or a warp, all covered in the sections above.
What the hinge adjustment guides get wrong
Most how-to articles walk you through the three adjustment screws and leave it there. What they skip is the order problem: homeowners adjust height first because that's the most visible issue, then find the door is now off laterally, then fix that and discover the depth is wrong. Twenty minutes of work, zero progress.
The fix isn't complicated. Depth first, lateral second, height last. That sequence exists because depth affects how the door sits against the frame, which changes the apparent lateral gap, which in turn affects how height reads. Adjust them out of order and you're measuring a moving target.
The other thing guides underplay: most misalignments aren't adjustment problems at all. They're loose mounting screws. A door that's been opening and closing for years gradually works its screws loose, and the door drifts. Tighten the four mounting screws, and the door snaps back into position without touching a single adjustment screw. That's the fix for probably half the misaligned cabinet doors in any given kitchen.
If you want more hands-on repair context, the common HDB handyman repairs guide covers cabinet fixes alongside other typical home repairs.
When the DIY fix is done but the problem keeps coming back
Persistent misalignment after multiple adjustment attempts usually points to something a screwdriver can't solve: a cabinet box that's shifted off level, a frame that's lost its grip on the wall, or hardware that's simply worn out. That's where a professional handyman earns their keep.

Honestbuilders handles exactly this kind of repair, furniture installation, and cabinet work for homeowners across Singapore. The difference from a DIY attempt is a durable fix the first time: the right hardware, the correct mounting depth, and no stripped holes left behind. No hidden charges, no runaround. WhatsApp Honestbuilders at +65 9447 9696 or visit Honestbuilders for a free, no-obligation quote on handyman services.
Sources
- How To Adjust Cabinet Hinges
- How to Adjust Cabinet Hinges - Bob Vila
- Quick fixes for straighter cabinet doors
- How to Fix Crooked Cabinet Doors in 4 Easy Steps (DIY) | Family Handyman