
A reliable office flooring replacement workflow runs in seven phases: site survey, performance specification, operational planning, furniture and IT protection, installation, quality control, and maintenance handover. Done right, none of those phases require shutting your office down.
The one-line version facilities managers can paste into a project memo:
- Survey → Specify → Plan phases → Protect assets → Install by zone → Inspect and punch → Hand over documentation
Phased installs, after-hours scheduling, and furniture-lift technology are now standard practice for occupied-office flooring work, not premium add-ons. Most commercial carpet is replaced on a 7–10 year cycle, which means the average 50,000 sq ft office will run this workflow at least twice in a building lease term. Getting it right the first time saves the second project from repeating the same mistakes.
Key Takeaways
A phased, zone-by-zone office flooring replacement workflow, with thorough site survey and documented handover, is the most reliable way to deliver on schedule without disrupting operations.
| Point | Details |
|---|---|
| Phase small, return fast | Size each zone to complete within one weekend so staff re-occupy Monday morning without disruption. |
| Survey before you scope | Moisture testing and subfloor inspection before bidding prevents the change orders that blow budgets. |
| Specify performance, not aesthetics | Write a success brief covering durability, rolling-load resistance, and acoustic needs before choosing a material. |
| Require line-item quotes | A lump-sum bid hides exclusions; require separate line items for demo, subfloor prep, furniture handling, and after-hours premiums. |
| Honestbuilders for occupied offices | Honestbuilders delivers the full commercial flooring workflow, from site survey through warranty handover, for live office environments. |
Table of Contents
- What does your office flooring replacement workflow start with?
- How do you choose the right flooring material for an office?
- How do you plan phased installation to keep the office running?
- When should you move furniture versus protect it in place?
- What does the installation process look like, step by step?
- What should a final inspection and handover include?
- How do you compare contractor quotes fairly?
- A copyable project timeline your team can use right now
- The one rule that actually protects an occupied-office flooring project
- Honestbuilders handles occupied-office flooring from survey to handover
- Sources
What does your office flooring replacement workflow start with?
The site survey is where every cost overrun and schedule slip is either prevented or created. Contractors who skip it quote against assumptions. You pay for the gap.
What to inspect before you write a scope
Walk every zone with a clipboard and map the following:
- Traffic patterns: identify high-density corridors, reception areas, and conference clusters separately from private offices. Each zone may warrant a different material or installation sequence.
- Existing floor condition: note delamination, bubbling, cracking, or adhesive residue. These add subfloor prep time that low bids routinely exclude.
- Transitions and thresholds: count every doorway, elevator threshold, and floor-height change. Mismatched transitions are a common punchlist item that delays final sign-off.
- Access points: confirm which service elevators and loading docks are available, their weight limits, and any building-management restrictions on delivery hours.
- Subfloor type: concrete slab, raised access floor, or wood subframe each require different prep and adhesive systems.
Moisture and flatness testing
Request these two tests in every bid for concrete-slab installations. Relative humidity (RH) testing per ASTM F2170 and moisture vapor emission rate (MVER) testing per ASTM F1869 tell you whether the slab is dry enough for adhesive-down products. Flatness tolerances matter too: most resilient flooring specs call for no more than 3/16 inch variation over a 10-foot span. If the slab fails either test, expect mitigation work that adds cost and time. Better to know before the bid closes than after demo day.
Stakeholder matrix
Four groups control decisions that affect your schedule. Map them before you draft the scope:
| Stakeholder | Decision they control |
|---|---|
| IT / AV | Cable tray access, server room shutdowns, UPS coordination |
| Building operations | Elevator reservations, loading dock hours, HVAC access |
| Security | After-hours badge access, contractor credentialing |
| Tenant rep / HR | Staff communication, temporary seating, move logistics |
Pro Tip: A thorough site survey typically cuts change orders by identifying subfloor conditions, access constraints, and stakeholder conflicts before the contract is signed — not after demo day.
How do you choose the right flooring material for an office?
Start with a success brief, not a finish board. Write down your durability targets, cleaning regimen, acoustic requirements, rolling-load resistance, and any slip or fire ratings the building code or lease requires. Then match materials to those criteria.
Material options and their trade-offs
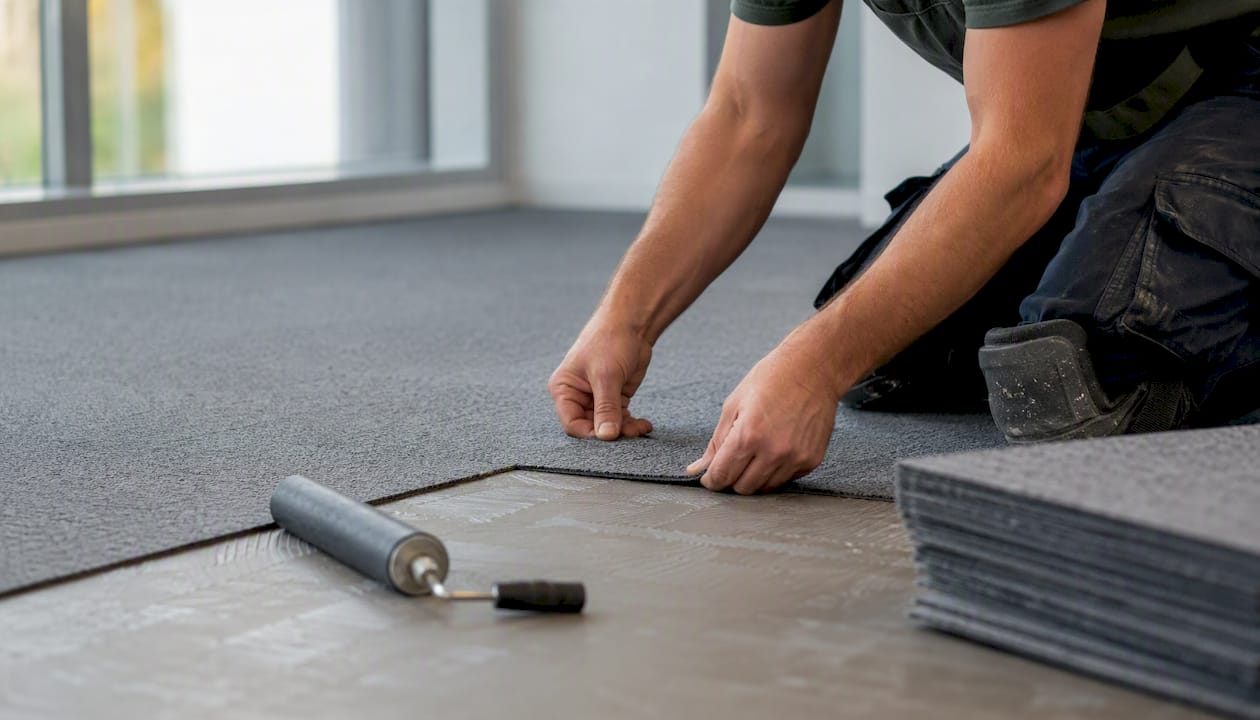
Carpet tile is the default for most private-office and conference zones. It installs faster than broadloom, absorbs sound, and lets you replace individual tiles when a section wears or stains. The modularity also means a future re-layout costs far less. The trade-off is higher per-unit material cost and lower resistance to rolling loads from heavy carts.
Luxury vinyl tile (LVT) handles rolling loads well, cleans easily, and installs with minimal subfloor prep when the slab is in good condition. Wear layers range from 12 mil for light commercial to 28 mil for heavy-traffic corridors. Plank formats can mimic wood convincingly, which matters for reception areas where aesthetics drive stakeholder approval.
Sheet vinyl costs less per square foot than LVT and eliminates seams in wet or high-traffic zones, but repairs require patching an entire section rather than swapping a tile. It suits break rooms and server corridors better than open-plan offices.
Rubber flooring excels in gyms, stairwells, and any area with heavy equipment. It is durable and slip-resistant but expensive and acoustically neutral, so it rarely makes sense for general office space.
Polished concrete is the lowest-maintenance option over a 20-year horizon, but the grinding and sealing process generates dust and noise that make phased occupied installs difficult. It suits ground-floor or warehouse-adjacent spaces where a full-zone shutdown is feasible.
Performance comparison
| Criteria | Carpet tile | LVT | Sheet vinyl | Polished concrete |
|---|---|---|---|---|
| Durability (heavy traffic) | Moderate | High | Moderate | Very high |
| Repairability | Excellent (tile swap) | Good (plank swap) | Fair (patch) | Poor (regrind) |
| Install downtime | Low | Low | Low | High |
| Expected lifecycle | 7–10 years | 20 years | 10 years | 20 years |
| Typical office use | Open plan, conference | Corridors, reception | Break rooms, utility | Ground floor, warehouse |
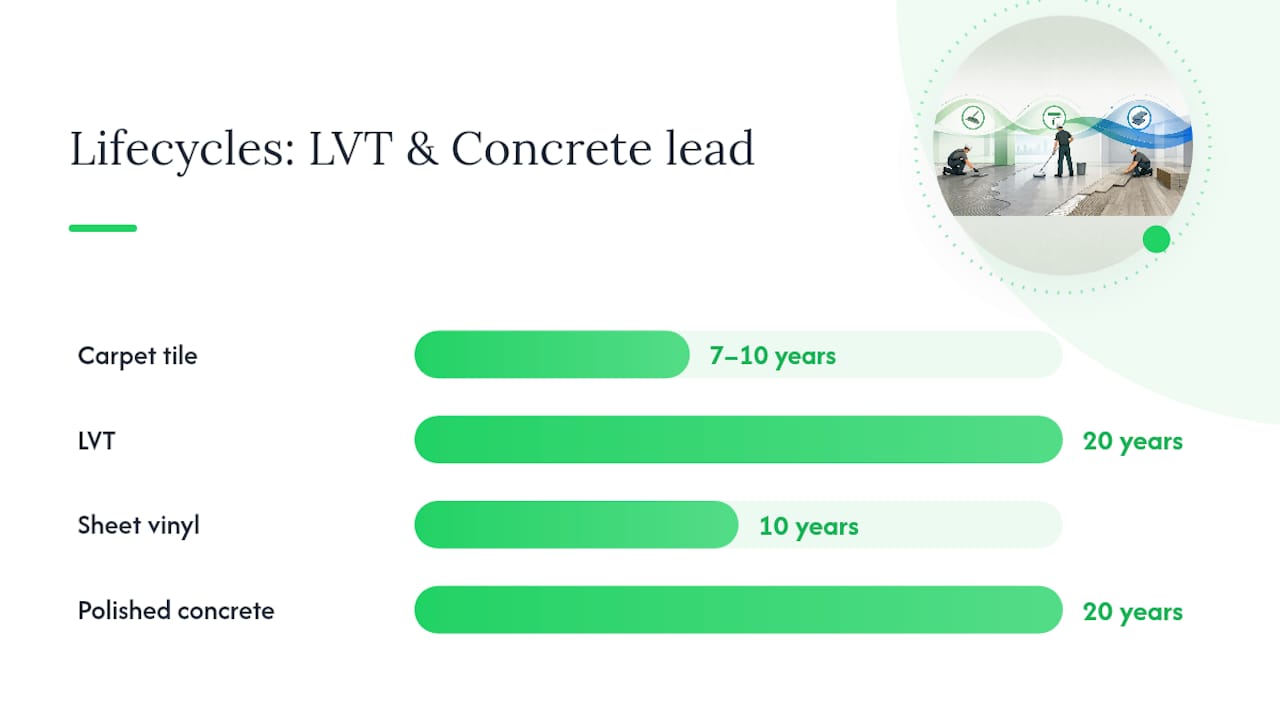
When repair costs approach a significant fraction of full replacement cost, replacement is typically the smarter financial call. Modular products like carpet tile and LVT make spot repairs inexpensive enough that you can defer full replacement longer, which is a real lifecycle-cost advantage.
Dye lots change, and a matching tile two years from now is worth far more than the storage space it takes up.*
How do you plan phased installation to keep the office running?
Phasing is the core skill in occupied-office flooring work. The goal is simple: every zone returns to service before the next business day begins.
Phasing approaches
Three models work in practice:
- Room-by-room: best for offices with many enclosed spaces. Each room is a self-contained zone. Staff relocate temporarily to an adjacent room, and the installer finishes one room per shift.
- Wing-by-wing: works for open-plan floors divided by fire corridors or structural bays. Larger zones mean faster overall completion but require more temporary seating capacity.
- Weekend zone installs: the most common model for occupied offices. Crews mobilize Friday evening and complete a defined zone by Sunday night. Staff return Monday morning to a finished floor.
Choose your phasing size by asking one question: how many people can you relocate temporarily without disrupting core operations? If the answer is 20, your zone size is 20 workstations. If it is 0, you are doing after-hours work in sections small enough to complete overnight.
Sample weekend schedule
| Day | Activity |
|---|---|
| Thursday | Staff notified, zone cleared, IT cables labeled and lifted |
| Friday 5 PM | Crew mobilizes, furniture moved or lifted, demo begins |
| Saturday | Subfloor prep, material layout, installation |
| Sunday | Finishing, seams, trim, initial clean, protection film applied |
| Monday 7 AM | Zone returned to service, staff re-occupy |
Restricted access and after-hours requirements commonly add 30–50% to quoted project duration compared to a continuous-access install. Factor that into your schedule before you commit to a completion date.
Containment and communication
Dust and noise travel. Use floor-to-ceiling poly barriers at zone boundaries, and consider negative-air machines when demo involves old adhesive or any suspect materials. Protect adjacent carpet with ram board or corrugated cardboard on high-traffic paths.
A communication timeline keeps staff from being surprised:
- 3–4 weeks out: announce the project, share the phasing map, identify temporary seating areas
- 1–2 weeks out: confirm which zones install first, send move instructions to affected staff
- 48 hours out: final reminder with specific move-out times and IT coordination contacts
- Day of: post signage at zone boundaries and service elevator
Giving employees 1–2 weeks' advance notice for major projects is a practical minimum. Less than that and you get last-minute furniture that wasn't moved, which stalls the crew.
When should you move furniture versus protect it in place?
The answer depends on four variables: furniture density, item weight, equipment sensitivity, and the cost of moving versus the risk of damage.
Move vs protect decision matrix
| Condition | Recommended action |
|---|---|
| Freestanding desks, chairs, light shelving | Move to adjacent zone or corridor |
| Built-in millwork, heavy filing systems | Protect in place with furniture sliders and floor protection |
| Live servers, UPS units, network racks | Coordinate IT shutdown window; move only with IT sign-off |
| Modular workstations (panel systems) | Partial disassembly; use furniture-lift equipment |
| Medical or lab equipment | Specialist move vendor required; do not include in flooring contract |
Furniture-lift equipment, which raises workstation panels a few inches off the floor while the installer works underneath, is standard for dense open-plan offices. It avoids full disassembly and cuts move time significantly.
Practical packing and labeling
When items must move, label every piece before it leaves the zone. A simple system: zone letter plus workstation number on a piece of blue tape. Photograph the cable layout at each workstation before IT disconnects anything. That photo is your re-setup guide and eliminates the "where did this go?" calls after re-occupancy.
IT coordination
Schedule a brief IT walkthrough before the scope is finalized. Identify which cable trays are under the floor, which UPS units cannot be powered down, and whether any server rooms share a wall with a flooring zone. For rooms with live equipment, plan the install sequence so those areas are last, giving IT maximum time to prepare a shutdown window.
Pro Tip: Assign one person on the facilities team as the IT liaison for the project. A single point of contact prevents the "I thought you told them" miscommunications that delay re-occupancy.
What does the installation process look like, step by step?
The installation sequence is consistent across most commercial flooring products, though duration varies by material and access conditions.
Typical installation sequence
- Mobilization: crew arrives, staging area confirmed, protection film on elevators and corridors
- Demolition and removal: existing flooring stripped, adhesive residue addressed, debris staged for disposal
- Subfloor prep: grinding high spots, filling low spots, skim-coating if needed to meet flatness spec
- Material acclimation: product staged in the space at ambient temperature and humidity (typically 24–48 hours for LVT; carpet tile is less sensitive)
- Layout: reference lines snapped, starting point confirmed against the room's dominant sight line
- Installation: tiles or planks set, adhesive or click-lock system applied per manufacturer spec
- Seams, transitions, and trim: reducer strips, T-moldings, and base installed
- Initial clean and protection: surface cleaned, protection film or ram board applied for contractor traffic
Realistic duration windows
A 10,000 sq ft open-plan floor with continuous access typically takes 3–5 days for carpet tile or LVT, assuming the subfloor is in good condition. Weekend-only phasing stretches that to 3–4 weekends for the same area. Subfloor remediation, moisture mitigation, or complex transitions add time that is difficult to estimate without a site survey.
Restricted-access schedules add 30–50% to quoted duration compared to a continuous-access install, so a 4-day job becomes a 6-day job when crews work evenings only.
Cure times and load restrictions
Most pressure-sensitive adhesives used for carpet tile reach handling strength within 24 hours but full cure in 48–72 hours. LVT adhesive systems vary: some allow foot traffic in 24 hours but restrict rolling loads for 48–72 hours. Check the manufacturer's technical data sheet, not the installer's verbal estimate. Returning heavy furniture or rolling carts too early can telegraph adhesive and void the warranty.
Pro Tip: Schedule the final zone to finish by Saturday evening, not Sunday night. That buffer absorbs any Sunday-morning punch items and still returns the space by Monday 7 AM.
What should a final inspection and handover include?
The punchlist is your last point of leverage before you release final payment. Use it.
Final inspection checklist
| Item | What to check |
|---|---|
| Seams | Tight, no gaps, no peaking, pattern-matched where specified |
| Transitions | Flush, mechanically fastened, no trip hazard |
| Flatness | No tenting, bubbling, or hollow spots under foot |
| Adhesive coverage | No visible squeeze-out, no adhesive on face of material |
| Base and trim | Fully adhered, mitered corners, no gaps at walls |
| Cleaning | Surface clean, no adhesive residue, protection removed |
| Spare material | Confirmed quantity stored and location documented |
Walk the space with the lead installer, not just the project manager. The installer knows where the difficult spots were and can point them out before you find them yourself.
Punchlist workflow
Document every deficiency with a photo, a location reference (zone, bay number), and a description. Set a remediation deadline in writing, typically 5–10 business days for cosmetic items and 24–48 hours for safety-related issues like a trip-hazard threshold. Do not release the final payment milestone until the punchlist is closed and you have signed off in writing.
Handover documents to collect
- Manufacturer warranty certificates, registered in the building's name
- Installer certification documentation (required by most manufacturers to validate the warranty)
- Subfloor prep records (moisture test results, skim-coat product and thickness)
- Recommended cleaning products and dilution ratios
- Maintenance schedule (stripping, recoating, or deep-clean intervals)
- Spare material inventory: product name, dye lot, quantity, storage location
Warranty coverage depends on documented substrate prep and certified installation. If the contractor cannot produce installer certification, the manufacturer warranty may be void before the floor is a year old.
How do you compare contractor quotes fairly?
Low bids win jobs. Change orders win profits. Your job is to close the gap between them before you sign.
Line items to require in every proposal
Every quote should break out these items separately. A lump-sum bid is a change-order waiting to happen:
- Material (product name, manufacturer, dye lot, quantity)
- Removal and disposal of existing flooring
- Subfloor prep (allowance for grinding, patching, skim-coat)
- Moisture mitigation (if RH or MVER testing indicates a risk)
- Furniture moving or furniture-lift service
- After-hours or weekend premium
- Project management and supervision
- Warranty (product and labor, duration, conditions)
- Allowance for unforeseen substrate conditions
Common low-bid exclusions to spot
- Subfloor prep listed as "allowance only" with no unit rate for overages
- Furniture moving excluded entirely ("by others")
- After-hours work assumed as standard hours (check the schedule assumptions)
- Moisture mitigation excluded pending testing (who pays if the test fails?)
- Disposal fees listed as "per dumpster" with no cap
Sample cost ranges
All-in occupied-office costs commonly range from roughly $5.50 to $9.50 per sq ft depending on scope, phasing, and services included. After-hours and weekend premiums, furniture handling, and subfloor remediation are the three biggest variables. A quote at the low end of that range that excludes all three is not a bargain.
Contract provisions to insist on
- General liability and workers' compensation certificates naming your organization as additional insured
- Certified installer requirement for manufacturer warranty validity
- Payment milestones tied to completion of defined phases, not calendar dates
- A defined substantial completion date with a liquidated damages clause if the project affects a lease event or move-in date
For contract language guidance, a commercial renovation contract review is worth the time before you sign anything with a large scope.
For projects that include strip-out of existing interior finishes, coordinating with a commercial interior strip-out specialist early in the bid process helps clarify demo scope and waste staging before quotes are finalized.
A copyable project timeline your team can use right now
This template covers a 10,000 sq ft office completed in weekend zones over four weekends. Adjust zone count and crew size to your floor plate.
Week-by-week phasing calendar
- Weeks 1–2: Site survey, moisture testing, stakeholder matrix completed; scope finalized
- Week 3: Bid documents issued to three or more contractors; visualizer or finish board shared with stakeholders for approval
- Week 4: Bids received, leveled, and awarded; contract signed; material ordered
- Week 5: Material delivered to staging area; acclimation begins; freight elevator reserved; staff notices sent (1–2 weeks ahead of first install)
- Weekend 1: Zone A demo, subfloor prep, installation, initial clean; Monday re-occupancy confirmed
- Weekend 2: Zone B same sequence; punchlist from Zone A closed before Weekend 2 begins
- Weekend 3: Zone C; mid-project quality review with contractor
- Weekend 4: Zone D (final zone); full punchlist walk, handover documents collected, spare material stored
- Week 10: Final payment released after punchlist sign-off; warranty registered; maintenance schedule distributed to operations team
Milestone checklist
- Site survey and moisture test complete
- Success brief and performance criteria approved by stakeholders
- Material specified, samples approved, order placed
- Staging and acclimation area confirmed; freight elevator reserved
- Staff communication sent (minimum 1–2 weeks before first zone)
- IT coordination complete; cable trays and shutdown windows confirmed
- Demo and subfloor prep complete per zone
- Installation complete per zone; protection applied
- Punchlist documented and closed per zone
- Handover documents received: warranties, maintenance protocol, spare material inventory
For multi-floor projects, run the same template per floor and stagger start dates by one weekend to allow the same crew to sequence floors without gaps. For a single large floor, split it into more zones rather than fewer to keep each zone returnable to service within one weekend. The warehouse refurbishment planning guide covers similar phasing logic for larger footprints.
The one rule that actually protects an occupied-office flooring project
Most facilities managers focus on the wrong risk. They worry about material selection and contractor price. The real risk is zone size.
Phase small enough that every zone returns to service the next business day. That single rule contains most of the damage a flooring project can do to an occupied office. A zone that runs long by one day cascades into displaced staff, IT equipment sitting in corridors, and a contractor crew working in a space that was supposed to be occupied. None of that is recoverable cheaply.
The instinct is to phase large to finish faster. It rarely works. A larger zone means more variables, more furniture to move, more subfloor surprises, and a longer recovery window if something goes wrong. A zone sized to finish in one weekend, with a Sunday-evening buffer built in, almost always delivers. Two weekends of reliable delivery builds more trust with leadership than one ambitious weekend that runs into Tuesday.
The same logic applies to the punchlist. Close it zone by zone, not at the end of the project. A contractor who knows you will not release the next zone's payment until the current zone's punchlist is closed will prioritize remediation. One who knows you are saving it all for the end will not.
Honestbuilders handles occupied-office flooring from survey to handover
Replacing flooring in a live office is a coordination problem as much as a construction one. Honestbuilders' commercial renovation service covers the full workflow for occupied offices: site survey and moisture assessment, phased installation scheduling, after-hours and weekend crews, furniture handling, and complete warranty and maintenance handover documentation.

For facilities managers who need a contractor that shows up on schedule and closes the punchlist before final payment, the scope includes:
- Site survey, subfloor assessment, and phasing map
- Material specification support and stakeholder finish-board coordination
- Phased weekend and after-hours installation with containment
- Furniture moving and protection in place
- Final inspection, punchlist management, and warranty registration
- Maintenance protocol and spare material handover
Contact Honestbuilders for a no-obligation quote on your next commercial flooring project. No hidden charges, no runaround.
Sources
The following sources informed this guide and are worth bookmarking for technical specifications and procurement language:
- How Do I Replace Flooring in an Occupied Space? - Consolidated Flooring
- Commercial Carpet Replacement: Complete Guide for Homeowners - D and G Flooring
- How to Prepare Your Business for a Commercial Flooring Installation - Alliance Flooring Services