
Bathroom renovation step by step is the phased process of planning, demolishing, rebuilding, and finishing a bathroom in a specific sequence to deliver quality results on time and within budget. The bathroom is one of the most technical rooms in any home because moisture, water, electricity, and ventilation all converge in a tight space. Skipping steps or changing the order of work adds time, cost, and risk. Homeowners should budget 5%–10% of home value for a primary bathroom renovation, plus a 10%–15% contingency buffer for hidden issues like water damage or outdated plumbing. Getting the sequence right from day one is what separates a smooth remodel from a costly redo.
What preparation and planning are required before starting a bathroom renovation?
Solid preparation is the single biggest factor in whether a bathroom remodel finishes on time and on budget. Most projects that run over schedule do so because the planning phase was rushed. A full bathroom remodel typically takes 4–8 weeks depending on complexity, permit delays, and inspection scheduling. That timeline only holds when materials are ordered, trades are booked, and the scope is locked before demolition begins.
Start with a thorough assessment of your current bathroom. Walk through the space and document what stays, what goes, and what needs upgrading. Check for soft spots in the floor, stained ceilings below upper-floor bathrooms, and the age of your plumbing and electrical panels. This audit shapes your budget and reveals whether you need licensed trades from day one.
Key preparation steps every homeowner should complete:
- Set a realistic budget. Use the 5%–10% of home value benchmark as your baseline, then add the 10%–15% contingency for hidden issues like water damage or noncompliant wiring.
- Decide what to DIY and what to hire out. DIY cosmetic updates can save 40%–65% on labor costs compared to hiring professionals for the entire project. Reserve licensed work, such as plumbing rough-ins and electrical panel changes, for qualified tradespeople.
- Order materials early. Fixtures and materials often have longer lead times and must be ordered weeks or months ahead to avoid project stalls. Custom cabinetry and specialty tiles are the most common culprits for delays.
- Obtain permits before breaking ground. Most jurisdictions require permits for plumbing and electrical changes. Skipping this step can void your home insurance and create problems when you sell.
- Build a project timeline. Map out each trade in sequence, including buffer days for inspections and deliveries.
Pro Tip: Order your vanity, toilet, and shower fixtures before you finalize your demolition date. If a fixture arrives damaged or backordered, you want that buffer time before the walls are already open.
For a deeper look at how to structure your renovation budget, the renovation budget planning guide from Honestbuilders covers contingency frameworks that apply directly to bathroom projects.
What is the recommended demolition and rough-in sequence?
The correct sequence of trades and work phases prevents costly rework and delays. Changing the order after work has started adds exponential time and labor costs. Demolition feels like the exciting part, but it requires discipline and a clear plan.
Follow this sequence to avoid expensive mistakes:
- Shut off utilities first. Turn off the water supply at the main valve and isolate the electrical circuits serving the bathroom at the breaker panel. Never start demo with live water or power in the space.
- Remove fixtures. Disconnect and remove the toilet, vanity, sink, and shower or tub. Cap all supply lines and drain openings immediately to prevent debris from entering pipes.
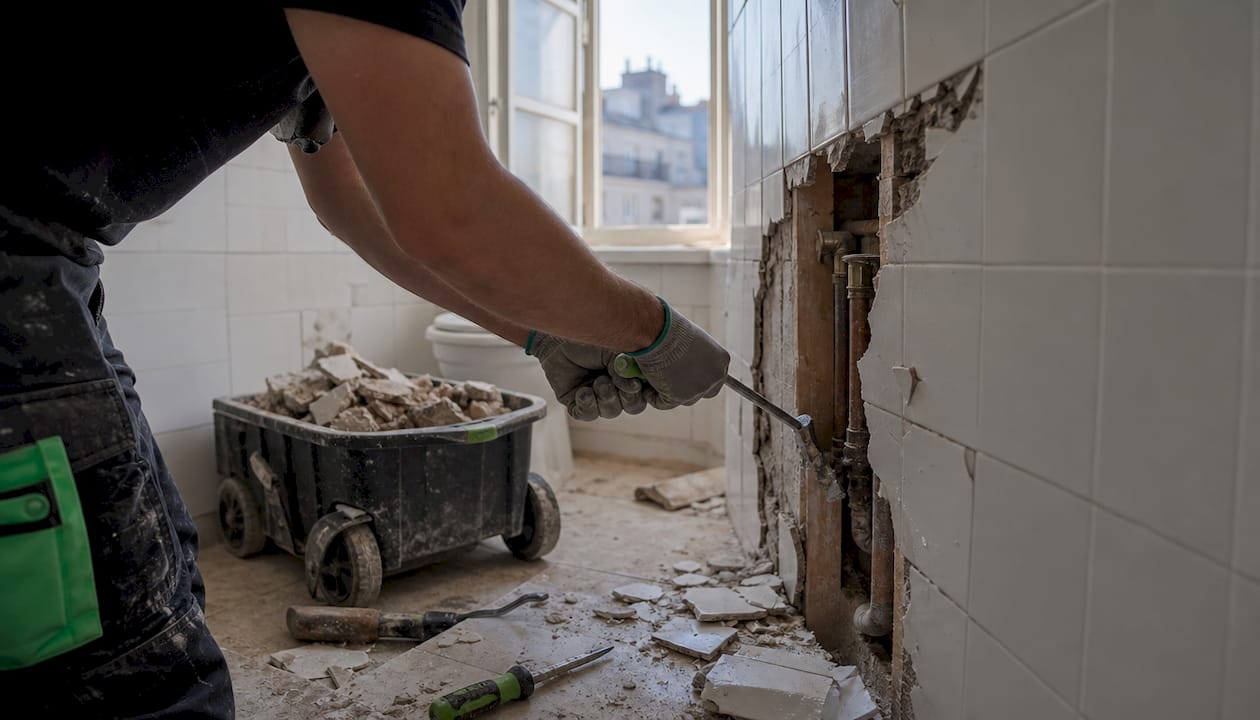
- Remove drywall in wet zones. Strip drywall from shower and tub surrounds first. This exposes the framing and reveals any hidden water damage before you commit to new materials.
- Pull up flooring last. Removing flooring after the walls are stripped protects the subfloor from dropped debris and gives you a clean surface to assess for rot or damage.
- Inspect and document everything. The demolition phase often reveals hidden water damage, outdated galvanized pipes, or aluminum wiring that must be addressed before closing walls.
- Complete rough plumbing and electrical. A licensed plumber relocates drain lines and supply pipes. A licensed electrician runs new circuits, installs GFCI outlets, and positions exhaust fan wiring. These trades work before any walls close.
- Schedule rough-in inspections. Do not close walls until the inspector signs off. Failing to do so means tearing out finished work later.
Hidden water damage is the most common surprise during demolition. When you find it, treat it as a fixed cost, not a setback. Addressing it now costs far less than dealing with mold or structural failure after the renovation is complete.
How to correctly handle waterproofing and surface preparation?
Moisture management via proper waterproofing is the most important defense against structural damage in any bathroom renovation. A beautiful tile job installed over inadequate waterproofing will fail within a few years. This phase is where most DIY bathrooms go wrong, and where professional expertise pays for itself.
Waterproofing materials and methods
Sheet membrane systems and liquid-applied membranes are the two primary waterproofing approaches for residential bathrooms. Sheet membranes, such as those used in bonded waterproofing assemblies, offer consistent thickness and are well-suited for shower floors and walls. Liquid-applied membranes work well for irregular surfaces and transitions. Both require sealed joints at corners, curbs, and penetrations.
Critical waterproofing and prep steps:
- Install cement board or tile backer on all shower and tub surround walls before applying any membrane. Standard drywall, even moisture-resistant varieties, is not a substitute in wet zones.
- Apply the waterproofing membrane to all shower walls and floors, extending it at least 6 inches beyond the wet zone perimeter. Pay special attention to corners and pipe penetrations.
- Set the correct shower floor slope. The standard slope for a shower floor is 1/4 inch per foot toward the drain. Insufficient slope causes standing water and accelerates grout failure.
- Install blocking in the framing for towel bars, grab bars, and wall-mounted accessories before closing the walls. Retrofitting blocking after drywall is installed is far more labor-intensive.
- Sequence tile installation correctly. Tile the floor before the walls so wall tiles can overlap floor tiles at the base, directing water toward the drain rather than into the wall assembly.
| Phase | Key action | Common mistake |
|---|---|---|
| Backer board | Install cement board in all wet zones | Using standard drywall in shower areas |
| Membrane | Apply and seal all transitions and corners | Skipping corner sealing |
| Slope | Set 1/4-inch-per-foot pitch to drain | Flat shower floor causing pooling |
| Tile sequence | Floor first, then walls | Tiling walls before floor |
| Grout sealing | Seal grout after full cure | Sealing too early or skipping entirely |
Pro Tip: Let your waterproofing membrane cure fully before tiling. Most manufacturers specify a minimum cure time of 24–48 hours. Rushing this step is the leading cause of membrane failure behind tiles.
Understanding wet works renovation in detail helps homeowners know exactly which tasks require licensed trades and which can be managed directly.
What steps are involved in installing fixtures, finishes, and the final inspection?
Fixture installation and finishing work is where the bathroom finally takes shape. The order of installation matters here just as much as it did during demolition. Installing in the wrong sequence forces you to work around finished surfaces and risks scratching or damaging completed work.
Follow this finishing sequence:
- Paint walls and ceilings first. Complete all painting before installing any fixtures or accessories. This protects hardware from paint drips and lets you work freely without masking everything.
- Install the vanity and cabinet. Set the vanity cabinet before the countertop and sink so you can make any leveling adjustments without working around plumbing connections.
- Connect plumbing fixtures. Install the toilet, sink, and faucets after the vanity is set. Test each connection for leaks before moving to the next fixture.
- Install lighting and exhaust fan. Connect lighting fixtures and the exhaust fan to their circuits. Test the fan for proper airflow before closing up the electrical box.
- Hang mirrors, towel bars, and accessories. Mount accessories into the blocking you installed during framing. Use a level on every piece.
- Seal the grout. Apply grout sealer after the grout has cured for at least 72 hours. Unsealed grout absorbs moisture and stains within months.
Pro Tip: Do a full walk-through with your contractor before making any final payment. Use a punch list to document every incomplete or defective item in writing. Hold the final payment until every item on that list is resolved.
The final inspection covers plumbing, electrical, and ventilation. Run every faucet, flush the toilet, and test the exhaust fan with a tissue to confirm adequate airflow. Check under the vanity and around the toilet base for any moisture after the first 24 hours of use. A bathroom accessories installation guide can help homeowners handle the final accessory phase themselves and save on labor costs.
Key Takeaways
A successful bathroom renovation depends on following the correct sequence from planning through final inspection, with waterproofing and licensed rough-in work as the non-negotiable foundations.
| Point | Details |
|---|---|
| Budget with a contingency | Set aside 5%–10% of home value plus a 10%–15% buffer for hidden issues. |
| Order materials early | Long lead times on fixtures and custom finishes can stall a project for weeks. |
| Follow the trade sequence | Rough plumbing and electrical must be inspected before walls close. |
| Waterproof before tiling | Membrane systems and sealed transitions protect against structural water damage. |
| Use a punch list | Document every defect before final payment to protect your investment. |
What I've learned from watching DIY bathrooms go wrong
Failed DIY bathrooms often cost 20%–30% more to correct than if the work had been done by professionals from the start. I've seen this pattern repeat more times than I can count. A homeowner tiles a shower without a proper membrane, the grout starts cracking within a year, and by year two there's water behind the wall and a mold problem that requires full demolition.
The hybrid approach is where I've seen the best outcomes. A hybrid DIY and professional approach saves 15%–25% on labor while keeping the high-risk work in qualified hands. Homeowners who handle painting, accessory installation, and basic tiling in low-moisture areas save real money. Those who attempt their own plumbing rough-ins or skip waterproofing membranes pay for it later.
The other mistake I see constantly is poor scheduling. Homeowners book their tiler before the plumber has finished rough-ins. Then the tiler shows up, can't work, and the next available slot is three weeks out. That one scheduling error can add a month to your project. Book trades in sequence, confirm lead times on every material before you set a demolition date, and treat the contingency budget as money already spent.
Waterproofing and plumbing are not areas where watching a few online tutorials is sufficient preparation. They require hands-on experience, the right tools, and knowledge of local code requirements. Get those right, and the rest of the renovation is manageable.
— Rayner
Honestbuilders can handle your bathroom renovation end to end
Bathroom renovations involve more moving parts than most homeowners expect. Getting the sequence right, managing trades, and ensuring waterproofing is done to code requires experience that goes beyond a weekend project.

Honestbuilders is Singapore's trusted renovation specialist for HDB, condo, and landed properties. The team handles the full scope of bathroom renovation work, including hacking, plumbing, electrical, tiling, carpentry, and painting. Every project runs on fixed pricing with no hidden charges. WhatsApp Honestbuilders at +65 9447 9696 for a free, no-obligation quote and get a clear scope and timeline before any work begins.
FAQ
How long does a full bathroom renovation take?
A full bathroom remodel typically takes 4–8 weeks depending on the scope, permit approvals, and inspection scheduling. Complex projects with plumbing relocations or custom finishes run closer to the 8-week end.
What is the correct order of work in a bathroom renovation?
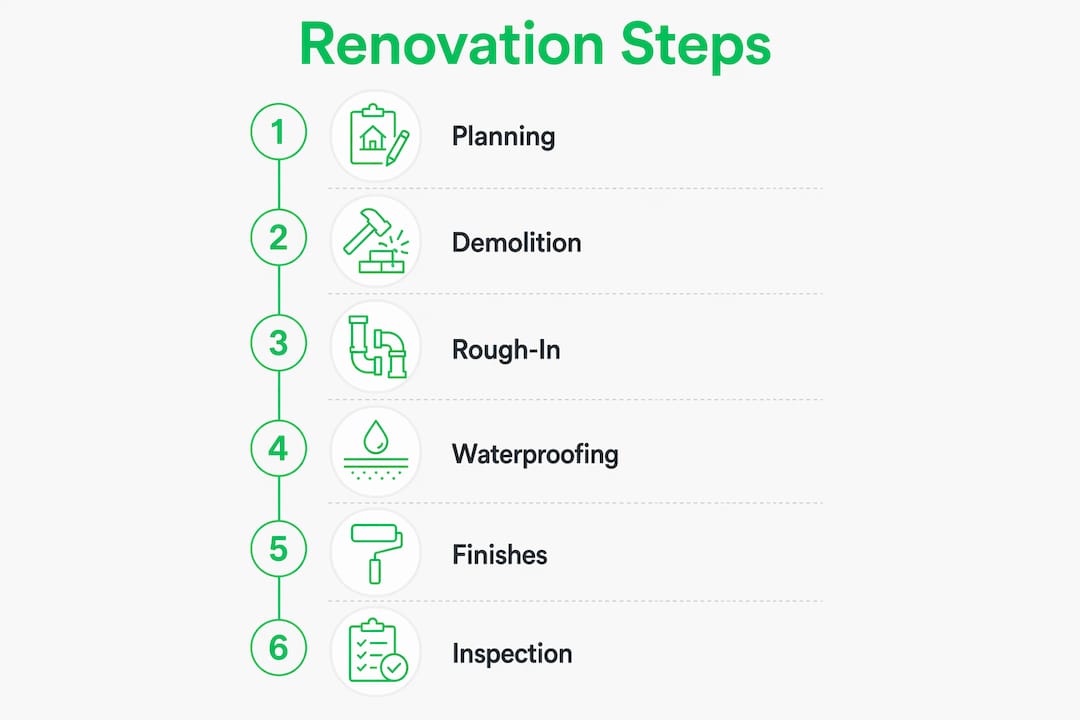
The correct sequence is planning and permits, demolition, rough plumbing and electrical, inspections, waterproofing, tiling, fixture installation, and finishing. Skipping or reordering steps causes rework and added cost.
Should I DIY my bathroom renovation or hire professionals?
A hybrid approach works best. DIY cosmetic tasks like painting and accessory installation can save 40%–65% on labor, while licensed trades handle plumbing, electrical, and waterproofing to meet code requirements.
Why is waterproofing so critical in a bathroom renovation?
Proper waterproofing is the primary defense against structural damage from moisture. Failed waterproofing leads to mold, rot, and full demolition, which costs far more than doing it correctly the first time.
How much should I budget for a bathroom renovation?
Budget 5%–10% of your home's value for a primary bathroom renovation, plus a 10%–15% contingency buffer for unexpected issues like hidden water damage or outdated wiring.