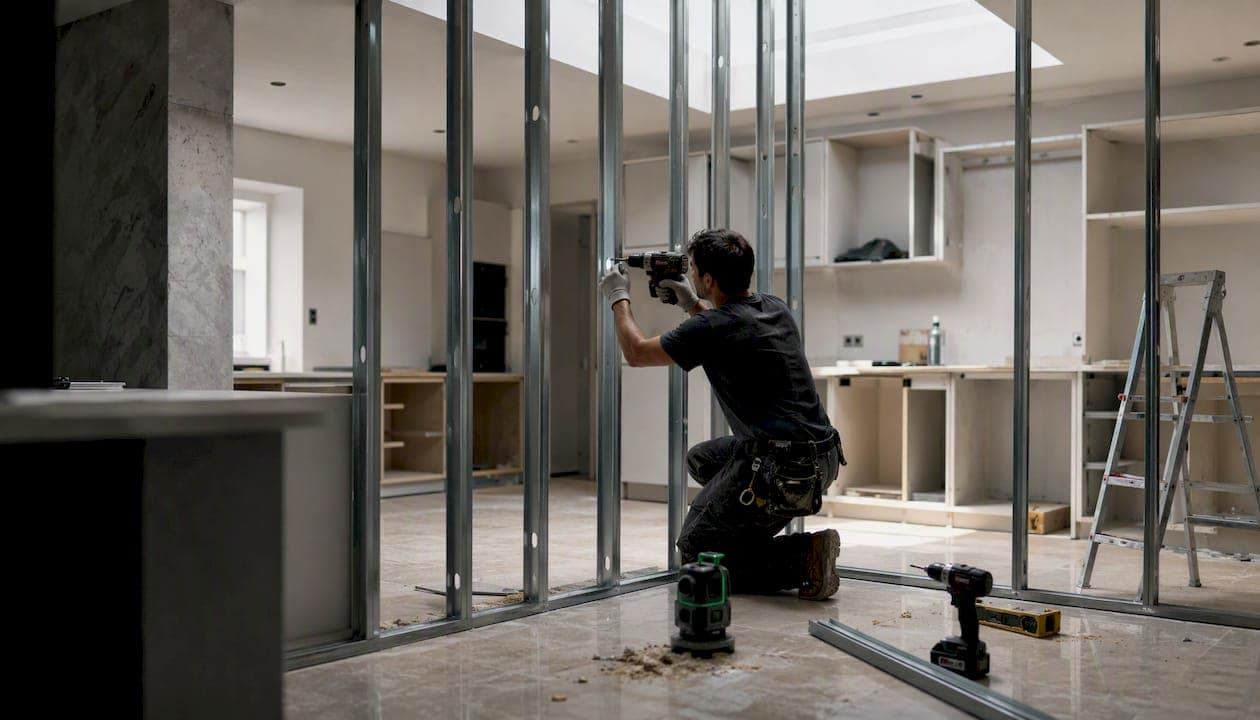
Partition panel installation is the process of building or mounting non-load-bearing interior panels, framed assemblies, or modular systems to divide interior space without altering a building's structural skeleton. According to Kreo Software, partition walls are interior divisions that can be permanent site-built assemblies, demountable modular systems, or glass partitions. The five systems you'll encounter most often are:
- Metal-stud with gypsum board — the standard for most U.S. residential and commercial builds
- Timber-stud with board — common in older homes and light residential work
- Framed glass partitions — aluminum or steel frames holding tempered or laminated glass panels
- Frameless glass partitions — hardware-only systems with no visible perimeter frame
- Modular/demountable panels — pre-finished kit systems that slot into tracks and can be relocated
Cost and timeline vary significantly by system and U.S. region. A basic metal-stud gypsum partition's installed cost varies and glass systems generally cost more per square foot. A simple single-room divider usually takes a short time to install; glass or demountable office fit-outs take longer depending on scope and crew size.
Key Takeaways
Partition panel installation covers a range of systems, and choosing the right one before you start determines both the cost and the quality of the finished result.
| Point | Details |
|---|---|
| Match system to use case | Metal-stud gypsum suits most builds; glass suits visibility; modular suits reconfigurable commercial spaces. |
| Budget by system type | Installed costs range from roughly $10/sq ft for gypsum to $100/sq ft for frameless glass. |
| Sequence matters | Plan services before closing the cavity; acoustic sealing at perimeter gaps is the most overlooked step. |
| Check permits first | Egress changes, MEP work, and rated assemblies almost always require a permit from your local AHJ. |
| Honestbuilders for complex installs | Glass, rated assemblies, and commercial fit-outs benefit from professional installation to avoid rework and failed inspections. |
Table of Contents
- What types of partition panels and walls should you choose?
- What materials and tools do you need before you start?
- How does the installation workflow sequence work?
- How to install a metal-stud partition wall step by step
- What makes glass partition installation different?
- How do modular and demountable partition systems work?
- What does partition panel installation cost, and how long does it take?
- What are the advantages and disadvantages of each partition type?
- What U.S. code, safety, and permit rules apply to partition installation?
- How do you maintain and clean partition panels over time?
- What mistakes do installers make most often, and how do you avoid them?
- An installer's honest take on when to call a pro
- Honestbuilders handles partition installation the right way
- Sources
What types of partition panels and walls should you choose?
EverestInd's overview describes partition walls as interior dividing systems built from stud framing, brick, glass, or other panel materials — covering both temporary and permanent installs. Each system has a distinct performance profile.
Metal-stud with gypsum board is the workhorse of U.S. construction. Steel tracks anchor to the floor and ceiling, vertical studs fill the cavity, and gypsum board skins both faces. It accepts insulation, electrical, and plumbing easily. The finish looks identical to a standard painted wall. The downside: once it's up, moving it means demolition.
Timber-stud with board works the same way but uses wood framing. It's easier to cut and fasten by hand, which makes it popular for DIY residential work. Wood is more susceptible to moisture and movement than steel, so it's less common in commercial settings.
Framed glass partitions use aluminum or steel perimeter channels to hold tempered or laminated glass. They're the go-to for offices that want natural light without sacrificing acoustic separation. The frame adds rigidity and simplifies installation, but the visible profile isn't for everyone aesthetically.
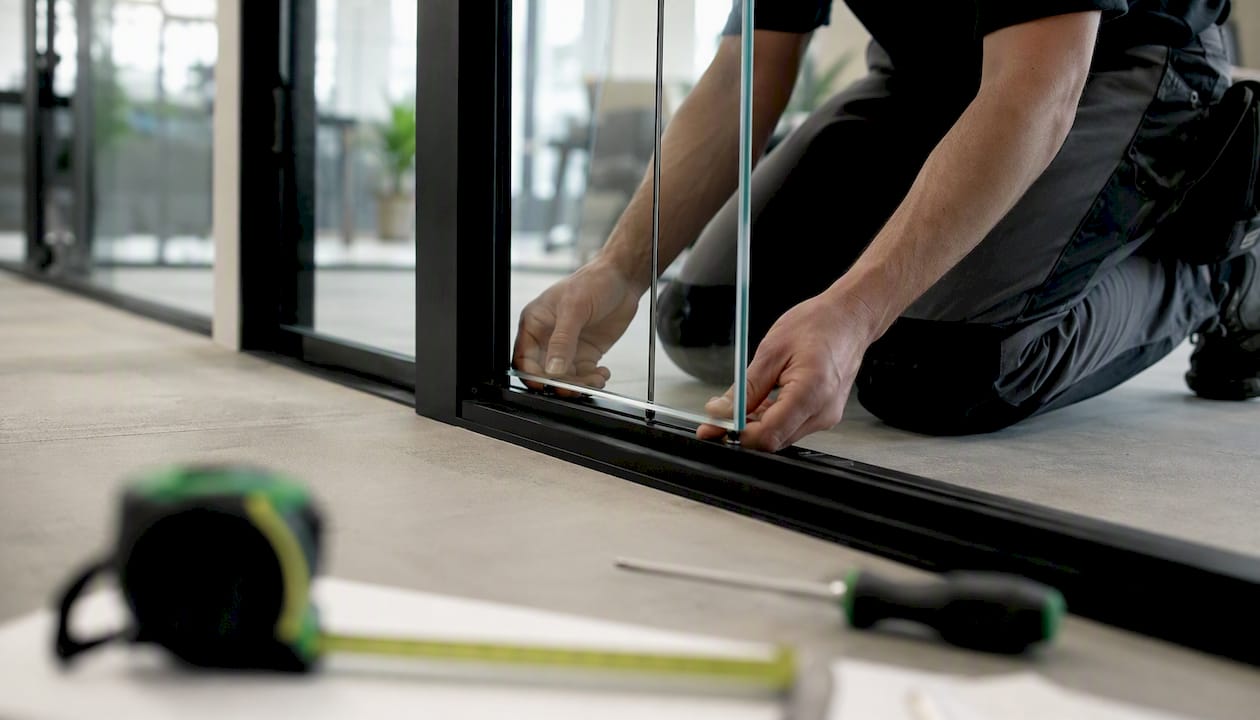
Frameless glass partitions rely on patch fittings, floor channels, and top rails to hold glass with no visible frame. The result is a clean, modern look. Installation is more exacting, glass thickness requirements are higher, and the cost is steeper.
Modular/demountable systems arrive as pre-finished panels that clip or slot into a post-and-panel or track frame. They're the fastest to install and the only type you can genuinely relocate without waste. Material cost tends to be higher than site-built options, and customization is limited to what the system manufacturer offers.
Acoustic and fire-rated assemblies aren't a separate visual category so much as a performance specification layered onto any of the above. A metal-stud wall with acoustic insulation, resilient channels, and fire-rated gypsum board can achieve both STC ratings above 50 and a one-hour or two-hour fire rating. These assemblies follow specific tested configurations — you can't improvise the build-up and expect the rating to hold.
What materials and tools do you need before you start?
Getting the materials list right before you start saves a second trip to the hardware store and keeps the job on schedule. Here's what a complete partition build typically requires.
Materials:
- Steel or timber tracks (floor and ceiling)
- Metal studs or timber studs (sized to wall height)
- Gypsum board or specialty fire-rated board (5/8" Type X for fire-rated assemblies)
- Joint compound, joint tape, and corner bead
- Drywall screws (coarse thread for wood, fine thread for metal studs)
- Concrete anchors or powder-actuated fasteners (for concrete slab floors/ceilings)
- Acoustic batt insulation (mineral wool or fiberglass)
- Resilient channels or acoustic clips (for sound-critical builds)
- Sealant/acoustic caulk for perimeter gaps
- Glass panels (tempered or laminated, sized to opening)
- Glass hardware: patch fittings, floor channels, top rails, silicone gaskets, and door hardware
- Base trim, reveals, and paint
Tools:
- Tape measure and chalk line
- Laser level or 4-foot spirit level
- Drill/driver and screw gun
- Tin snips (for cutting metal studs and track)
- Angle grinder or circular saw with metal blade (for heavier cuts)
- Glass suction cups (for handling glass panels)
- Shims
- Caulking gun
- Taping knives (6", 10", 12") and mud pan
- Sanding pole and fine-grit paper
Safety PPE:
- Safety glasses or goggles (mandatory when cutting metal or gypsum)
- Work gloves (metal stud edges are razor-sharp)
- N95 or P100 respirator when cutting or sanding gypsum board
- Hard hat and fall protection for any elevated work above six feet
Pro Tip: Buy 10–15% more gypsum board than your square-footage calculation suggests. Cuts around doors, outlets, and corners generate more waste than most first-timers expect, and running short mid-job stalls the whole schedule.
How does the installation workflow sequence work?
Every partition system, regardless of material, follows the same logical order. Understanding why the sequence exists helps you avoid the costly mistakes that come from skipping steps.
The sequence runs: planning and measurement → layout and track installation → framing or support structure → panel or glass mounting → insulation and services → finishing and trim → inspection.
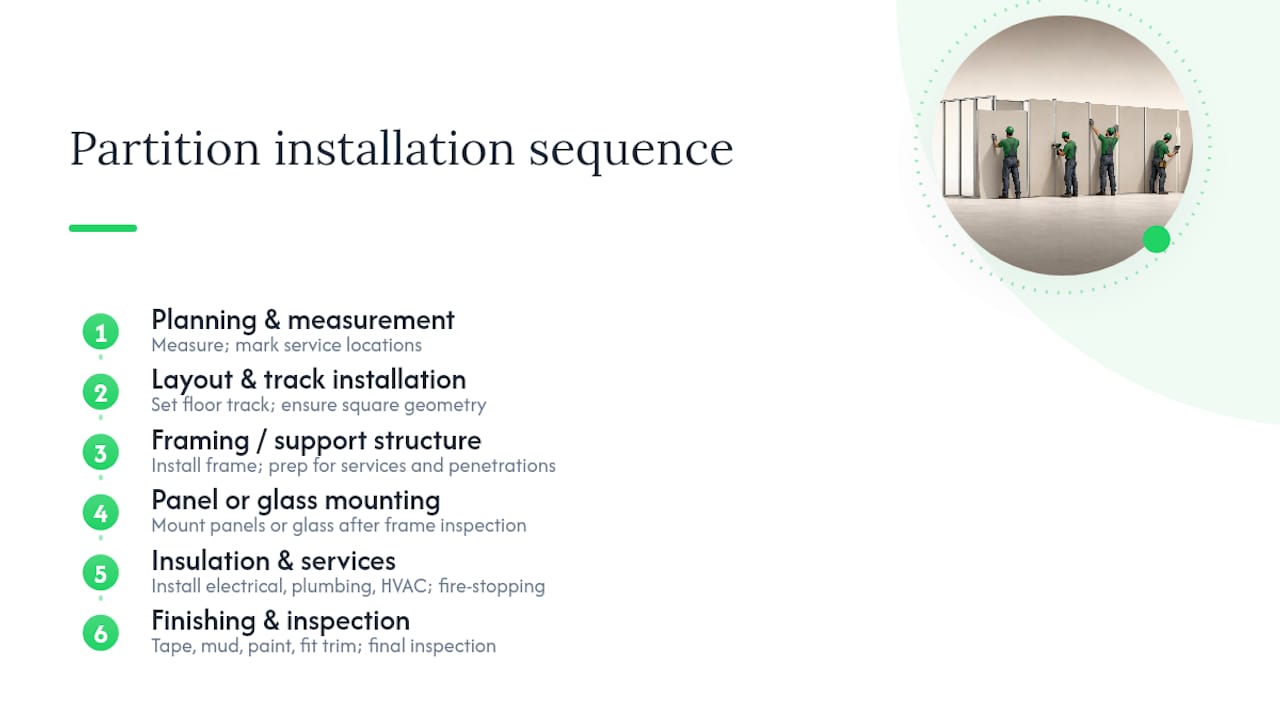
Planning comes first because every downstream step depends on accurate dimensions and a clear understanding of what's inside the existing walls, floor, and ceiling. Hitting a live electrical circuit or a plumbing run mid-install is expensive and dangerous. Mark all service locations before you cut a single track.
Track installation sets the geometry. A floor track that's even slightly out of square propagates error through every stud and panel above it. Get the layout right at this stage and the rest of the job is straightforward. Get it wrong and you're shimming and scribing for the rest of the project.
Framing goes in next, followed by any electrical rough-in, plumbing, or HVAC penetrations. Services must be installed before the cavity closes. Fire-stopping at penetrations is a code requirement in most U.S. jurisdictions, not an optional finish detail.
Panel or glass mounting follows once the frame is complete and inspected. Finishing — taping, mudding, sanding, painting, or trim installation — comes last. Rushing into finish work before the structure is solid is the single most common source of cracked joints and callbacks.
A simple single-room metal-stud partition with one door usually requires a few days for a small crew. A framed glass office partition of similar size typically takes longer due to glass handling, hardware setting, and sealant curing. A demountable modular system can often be completed more quickly. Checkatrade's installation guide confirms the one-to-two-day benchmark for straightforward site-built walls.
How to install a metal-stud partition wall step by step
Metal-stud gypsum construction is the dominant partition method in U.S. residential and commercial work. Here's the full sequence.
Pre-install checks:
Before ordering materials, measure the room height at multiple points. Floors and ceilings are rarely perfectly flat. Locate all existing services using a stud finder, wire detector, and pipe detector. Mark the partition layout on the floor with a chalk line, then transfer it to the ceiling using a laser level.
-
Install floor and ceiling tracks. Cut steel track to length with tin snips. Fasten the floor track to the slab or subfloor with concrete anchors or powder-actuated fasteners at 24" intervals. Fasten the ceiling track directly above, verified plumb with a laser level. For acoustic performance, apply a continuous bead of acoustic sealant under both tracks before fastening — this breaks the rigid connection between the track and the structure and meaningfully reduces flanking noise.
-
Cut and fit metal studs. Cut studs 3/8" shorter than the floor-to-ceiling height so they slip into both tracks without binding. Space studs at 16" on center for standard gypsum board, or 24" OC for lighter-duty applications. Check each stud for plumb before moving to the next. Door openings require doubled studs (king and jack) and a header.
-
Rough in electrical and other services. Run cables through the stud knockouts before closing the cavity. Install electrical boxes at the correct height, secured to studs. If plumbing or HVAC runs through the wall, coordinate with those trades now. Apply fire-stop sealant at all penetrations through rated assemblies.
-
Install insulation. Friction-fit acoustic batt insulation (mineral wool performs better than fiberglass for sound) into every stud bay. For higher STC ratings, add resilient channels or acoustic clips to one face of the wall before hanging board — this decouples the gypsum from the steel frame and is one of the most cost-effective sound upgrades available.
-
Attach gypsum board. Hang boards vertically, staggering end joints between layers if double-boarding. Fasten with fine-thread drywall screws at 12" intervals along studs, keeping screws 3/8" from board edges. Dimple each screw slightly below the surface without breaking the paper face. For fire-rated assemblies, use 5/8" Type X board and follow the tested assembly configuration exactly.
-
Tape and finish joints. Apply joint compound to all seams, embed paper tape, and feather the compound in three coats, letting each coat dry fully. Sand between coats. Finish corners with metal or vinyl corner bead. Prime before painting.
-
Install trim and finish. Base trim covers the gap between the gypsum and the floor. Door frames and reveals complete the opening. Paint or apply your chosen finish.
Pro Tip: Resilient channels are inexpensive relative to the STC improvement they deliver, but they only work if the gypsum board never makes rigid contact with the studs. A single screw driven directly through a resilient channel into a stud "short-circuits" the whole system. Mark your stud locations clearly and check every fastener before moving on.
What makes glass partition installation different?
Glass partitions require a different mindset from gypsum work. The margin for error is smaller, the materials are heavier and fragile, and the safety stakes are higher.
Glass type matters. Tempered glass is the standard safety glazing for most partition applications — it shatters into small, relatively harmless fragments rather than large shards. Laminated glass holds together when broken (two glass layers bonded by a PVB interlayer) and provides better acoustic performance. For partitions where sound control is a priority, laminated glass or double-glazed units outperform single-pane tempered. Always verify that the glass specified meets local code requirements for safety glazing in the application.
Framed vs. frameless. Framed systems use aluminum or steel perimeter channels that grip the glass edge. They're more forgiving of minor layout imperfections and easier to seal acoustically. Frameless systems rely on patch fittings bolted through holes drilled in the glass, plus floor channels and top rails. The glass must be drilled and edgework finished at the fabrication stage — you cannot modify it on site.
Key installation steps:
- Mark the layout precisely. Glass panels are fabricated to exact dimensions; a floor channel that's even 1/4" out of position means the panel won't fit.
- Anchor floor channels and top rails to the substrate. Use appropriate anchors for the floor type (concrete, wood subfloor, or raised access floor).
- Set the glass using suction cups. Never carry a large glass panel by its edge alone. Two people minimum; three for panels over 50 square feet.
- Seat the glass in the channel with setting blocks (neoprene pads that prevent glass-to-metal contact). Shim for plumb and level.
- Apply silicone sealant at all glass-to-frame and glass-to-floor interfaces. Use a neutral-cure silicone compatible with the frame material. Tooling the bead neatly matters for both appearance and weather/acoustic performance.
- Torque all patch fittings and hardware to the manufacturer's specification. Under-torqued fittings work loose; over-torqued fittings can crack the glass.
For large panels or any frameless glass installation, hire a licensed glazier. The liability exposure from an improperly installed glass partition is significant, and most jurisdictions require safety glazing certification. Door hardware selection for glass partitions also affects the overall finish — One Day Doors & Closets' panel door guide covers hardware and trim choices worth reviewing before finalizing your spec.
Maintenance: Clean glass with a non-abrasive glass cleaner and a microfiber cloth. Inspect silicone seals annually for cracking or separation. Lubricate pivot hinges and patch fittings with a dry lubricant once a year.
How do modular and demountable partition systems work?
Modular and demountable systems are fundamentally different from site-built partitions. Instead of building a wall from raw materials, you're assembling a manufacturer's kit of pre-finished components.
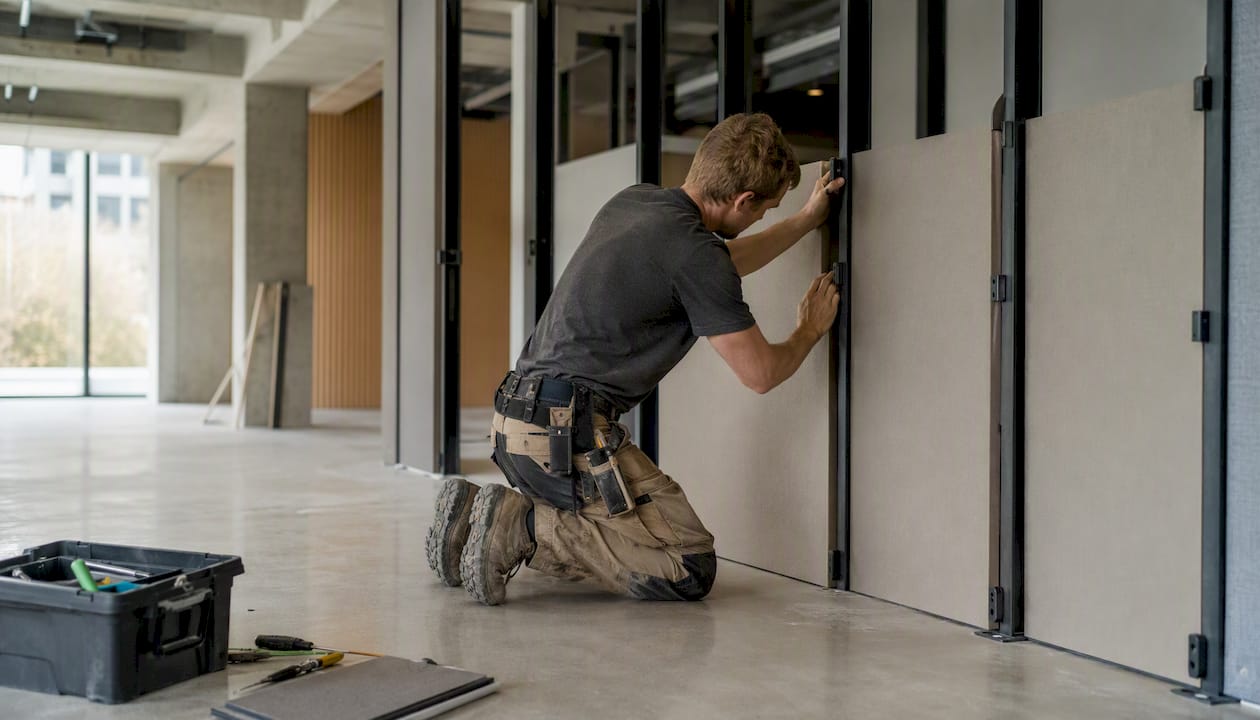
The core concept: panels (typically 2–4 inches thick, pre-finished on both faces) slot into a base channel on the floor and a head channel at the ceiling. Vertical posts or splines connect panels side by side. The system is self-supporting once assembled and requires no wet trades, no taping, and no painting.
Typical installation steps:
- Lay out and fasten base channels to the floor along the partition line
- Install ceiling channels directly above, verified plumb
- Insert vertical posts or splines at panel-width intervals
- Slide panels into the channels from one end, working toward the other
- Install infill trim pieces, electrical raceway covers, and door frames
- Apply perimeter sealant or compression gaskets where the system meets walls and ceilings
Pros:
- Fastest installation of any partition type — a small office can be partitioned in a single day
- Fully demountable and relocatable with no demolition waste
- Pre-finished surfaces mean no painting or finishing trades required
- Predictable cost because components are priced per panel
Cons:
- Limited customization — you're constrained to the manufacturer's panel sizes, finishes, and configurations
- Acoustic performance is generally lower than a well-built metal-stud assembly with insulation and resilient channels
- Material cost per square foot is typically higher than site-built gypsum construction
- Not all systems accept standard electrical outlets or data cabling without proprietary raceway components
Demountable systems make the most sense in leased commercial spaces where the tenant needs to reconfigure or remove the partition at the end of the lease, and in situations where speed of installation is the overriding priority.
What does partition panel installation cost, and how long does it take?
Cost is driven by system type, finish level, glass vs. gypsum, acoustic or fire ratings, electrical and HVAC coordination, site access, and regional labor rates. Elite Builder Renovation's cost guide identifies structural work, finishes, permits, and regional labor as the primary cost drivers when adding rooms or partitions.
The table below shows illustrative U.S. cost bands and timeline estimates. These are ranges based on typical market conditions and vary by region, finish specification, and project complexity.
| System type | Illustrative installed cost (per sq ft) | Typical timeline (2-person crew) |
|---|---|---|
| Metal-stud / gypsum (basic) | $10 | 1–2 days |
| Metal-stud / gypsum (acoustic/fire-rated) | $25 | 2–3 days |
| Framed glass partition | $60 | 2–3 days |
| Frameless glass partition | $100 | 3–5 days |
| Modular / demountable system | $40 | 1–2 days |
Figures are illustrative and region-dependent. Verify current pricing with local contractors.
For context on non-U.S. labor markets: a UK-based handyman service lists glazed or movable partitions in the £1,500–£5,000+ range for typical installations, with simple walls often completed in one to two days — broadly consistent with the U.S. timeline benchmarks above, though labor rates differ by market.
What adds to the cost beyond materials and labor:
- Permits and inspections (typically $100–$500+ depending on jurisdiction and scope)
- Electrical rough-in and panel upgrades
- HVAC modifications to serve the new space
- Fire-stop specialists for rated assemblies
- Licensed glazier for large or frameless glass panels
- Acoustic testing and certification for commercial tenant improvements
Permits add time as well as cost. A simple residential partition in most U.S. jurisdictions can be permitted in a few days to two weeks. A commercial tenant improvement with rated assemblies and MEP work can take four to eight weeks for permit approval before a single track is installed.
What are the advantages and disadvantages of each partition type?
Choosing the right system comes down to six criteria: sound requirements, permanence, fire rating, transparency, reconfigurability, and budget. Here's how each type maps to those criteria.
Metal-stud / gypsum is the best all-around choice for most U.S. residential and commercial applications. It handles acoustic insulation, fire ratings, electrical, and plumbing without compromise. The trade-off is permanence — it's a demolition job to move it.
Timber-stud / board suits light residential work and DIY projects where the installer is more comfortable with wood than steel. Avoid it in high-humidity areas or anywhere moisture is a recurring concern.
Framed glass works well for offices and commercial spaces that need visual openness without sacrificing a defined room boundary. It won't match the acoustic performance of a well-built gypsum wall, but it's a reasonable compromise. Feature wall finish choices can complement glass partitions when the goal is a cohesive interior aesthetic.
Frameless glass is the right call when the visual priority is maximum transparency and a clean, hardware-minimal look. Budget accordingly — it's the most expensive option per square foot and requires professional installation.
Modular / demountable fits leased commercial spaces, temporary configurations, and any situation where the partition needs to move within the building's life. Not the right choice for permanent residential rooms or any application requiring a fire rating.
Acoustic / fire-rated assemblies are non-negotiable in specific commercial occupancies (healthcare, multi-family residential, certain office classifications). They're also worth specifying in home offices or media rooms where sound isolation genuinely matters.
Quick decision checklist:
- Need sound control above STC 45? Use metal-stud with acoustic insulation and resilient channels.
- Need a fire rating? Use a tested metal-stud assembly with fire-rated gypsum board — follow the assembly configuration exactly.
- Need visual transparency? Choose framed or frameless glass.
- Need to reconfigure in the future? Use a modular/demountable system.
- Working on a tight budget with standard residential finishes? Metal-stud gypsum is the most cost-effective option.
- Prioritizing aesthetics in a high-end residential or commercial space? Consider interior door and trim options that complement the partition system.
What U.S. code, safety, and permit rules apply to partition installation?
Permits are not always required for interior partition work, but the triggers are more common than most homeowners expect. Check with your local building department before starting any of the following:
- Change of occupancy or use — converting a garage to a bedroom, or adding a room that changes the occupancy classification
- Egress alterations — any partition that blocks or modifies a required exit path, window egress, or corridor width
- MEP penetrations — electrical, plumbing, or HVAC work associated with the partition almost always requires a permit
- Structural changes — if the partition connects to or modifies any load-bearing element
- Fire-rated assemblies — rated walls in commercial occupancies require permit, inspection, and often third-party testing documentation
The authority having jurisdiction (AHJ) is the local building department or fire marshal. Their interpretation of the International Building Code (IBC) or International Residential Code (IRC) governs what's required in your specific location. Don't rely on what a neighbor did or what a contractor says is "usually fine" — call the AHJ directly.
For fire-rated assemblies, the partition must be built to a tested configuration listed by UL (Underwriters Laboratories) or an equivalent testing body. Substituting materials or changing fastener patterns voids the rating. A fire-stop specialist should seal all penetrations through rated walls.
Glass partitions in commercial applications must meet ANSI Z97.1 or CPSC 16 CFR Part 1201 safety glazing standards. Residential applications near doors, in bathrooms, and at low heights also trigger safety glazing requirements under the IRC. Verify the exact requirement with your AHJ before ordering glass.
When to hire a licensed professional rather than DIY: any rated assembly, any glass installation larger than a single small panel, any work involving electrical or plumbing, and any commercial tenant improvement. The permit and inspection process exists precisely to catch errors that create fire, structural, or safety hazards.
How do you maintain and clean partition panels over time?
Partitions need less maintenance than most building elements, but neglect shows up eventually — usually as drafts, rattles, staining, or compromised fire seals.
Gypsum and painted surfaces: Clean with a damp cloth and mild detergent. Avoid abrasive cleaners that damage the paint film. Touch up scuffs and dings with matching paint before they become staining problems. Inspect the perimeter sealant annually — acoustic caulk shrinks over time and gaps at the floor and ceiling track are the most common source of flanking noise complaints.
Laminated panel surfaces: Follow the manufacturer's cleaning instructions. Most laminate surfaces tolerate mild all-purpose cleaners but are damaged by solvents. Check edge trim and reveal pieces annually for loosening — a loose trim piece is usually a fastener issue, not a structural one.
Glass surfaces: Use a streak-free glass cleaner and a microfiber cloth. Never use abrasive pads on glass. Inspect silicone seals at the floor channel and perimeter annually. Cracked or separated silicone should be cut out and replaced — it's a straightforward repair that prevents moisture ingress and acoustic degradation.
Inspection checklist (annual):
- Check all visible fasteners and hardware for loosening
- Test door hardware (hinges, pivots, closers) for smooth operation and lubricate as needed
- Inspect perimeter sealant for cracks, gaps, or separation
- Check for moisture staining at the base of the partition (signals a leak or condensation issue)
- Listen for rattles or squeaks when the partition is subjected to normal building movement
Call a contractor when you notice persistent drafts through a rated wall, moisture damage at the base, rattling that doesn't resolve with hardware tightening, or any sign that a fire seal has been compromised. These aren't cosmetic issues — they affect the performance the partition was specified to deliver.
What mistakes do installers make most often, and how do you avoid them?
Most partition callbacks trace back to a small set of recurring errors. Knowing them in advance is cheaper than fixing them after the fact.
Failing to square the floor track. A track that's even slightly off-square creates a cascade of problems: studs that won't plumb, panels that won't fit, and door frames that rack. Snap a chalk line, verify it with a laser, and check the diagonal before fastening a single anchor.
Wrong stud spacing for the finish. Standard 5/8" gypsum board spans 24" OC without issue. Tile, heavy wall panels, or specialty finishes often require 16" OC or closer. Check the finish specification before framing.
Inadequate acoustic sealing. The most common reason a partition underperforms acoustically isn't the insulation — it's gaps. Every penetration, every outlet box, every gap at the floor and ceiling track is a flanking path. Seal everything with acoustic caulk before closing the cavity.
Ignoring service coordination. Electrical boxes, data outlets, and HVAC registers need to be located before the gypsum goes on. Moving them afterward means cutting, patching, and repainting.
Insufficient substrate prep for glass. A floor channel anchored to a cracked or uneven substrate will shift. Grind high spots, fill low spots, and verify the substrate is solid before setting any glass hardware.
Pro Tip: Before hanging a single sheet of gypsum board, do a dry run: hold one sheet against the framing and check that all studs land within the sheet's edges. A stud that falls 1/2" outside the sheet edge means the whole layout needs to shift. Catching this before you've screwed 20 sheets saves hours of rework.
Common post-install problems and fixes:
- Squeaking partition: Usually caused by gypsum board contacting the ceiling track directly. Cut the board 1/2" short of the ceiling and fill the gap with acoustic caulk.
- Uneven finish at joints: Caused by rushing coats. Let each mud coat dry completely (24 hours minimum in normal conditions) before applying the next.
- Sealant failure at glass: Cut out the failed bead completely, clean the substrate with isopropyl alcohol, and apply fresh neutral-cure silicone. Bridging over old sealant never holds.
An installer's honest take on when to call a pro
The DIY case for partition installation is real, but it has limits that most online guides understate.
A straightforward metal-stud gypsum partition in a residential space — no fire rating, no plumbing, standard electrical — is genuinely within reach for a skilled DIYer with the right tools and a full weekend. The steps are logical, the materials are forgiving, and the learning curve is manageable.
Glass partitions are a different story. The combination of heavy, fragile panels, precise hardware tolerances, and safety glazing requirements makes glass work genuinely risky for anyone without hands-on experience. A frameless glass partition that shifts or fails isn't just an aesthetic problem. The liability is real, and most jurisdictions require licensed glaziers for commercial installations.
Rated assemblies — fire-rated or acoustic-rated walls in commercial occupancies — should never be DIY projects. The tested configurations are specific, the inspection requirements are strict, and a failed inspection means tearing out work and starting over. The cost of hiring a specialist upfront is always less than the cost of a failed inspection and rework.
The honest framework: if the partition is simple, non-rated, and residential, DIY is a reasonable option if you're comfortable with the tools and the permit process. If it involves glass, ratings, MEP coordination, or a commercial occupancy, hire a professional. The Honestbuilders team handles renovation and installation work built on workmanship and accountability — no hidden charges, no runaround.
Honestbuilders handles partition installation the right way
Partition installation done right requires accurate measurement, proper sequencing, and the kind of trade coordination that's hard to manage solo. Honestbuilders offers full-scope renovation and handyman services for residential and commercial properties, covering everything from framing and carpentry to electrical coordination and finishing.

If you've read through this guide and concluded that your project involves glass, fire-rated assemblies, or MEP work, that's exactly the kind of job where professional installation pays for itself. Honestbuilders brings the tools, the sequencing knowledge, and the accountability to get it done without callbacks. WhatsApp +65 9447 9696 for a free, no-obligation quote on your partition project.
Sources
The following sources informed the technical guidance, cost frameworks, and workflow recommendations in this article.
- Exploring the Basics of Partition Walls - Kreo Software
- Our Complete Guide To Installing A Partition Wall
- What is a Partition Wall? Understanding Key Types and its Applications - EverestInd
- Find Expert London Installers for Partition Walls - Fantastic Handyman
- A Guide to Interior Panel Doors | One Day Doors & Closets
- Cost of Adding a Bedroom: 2026 Homeowner's Guide