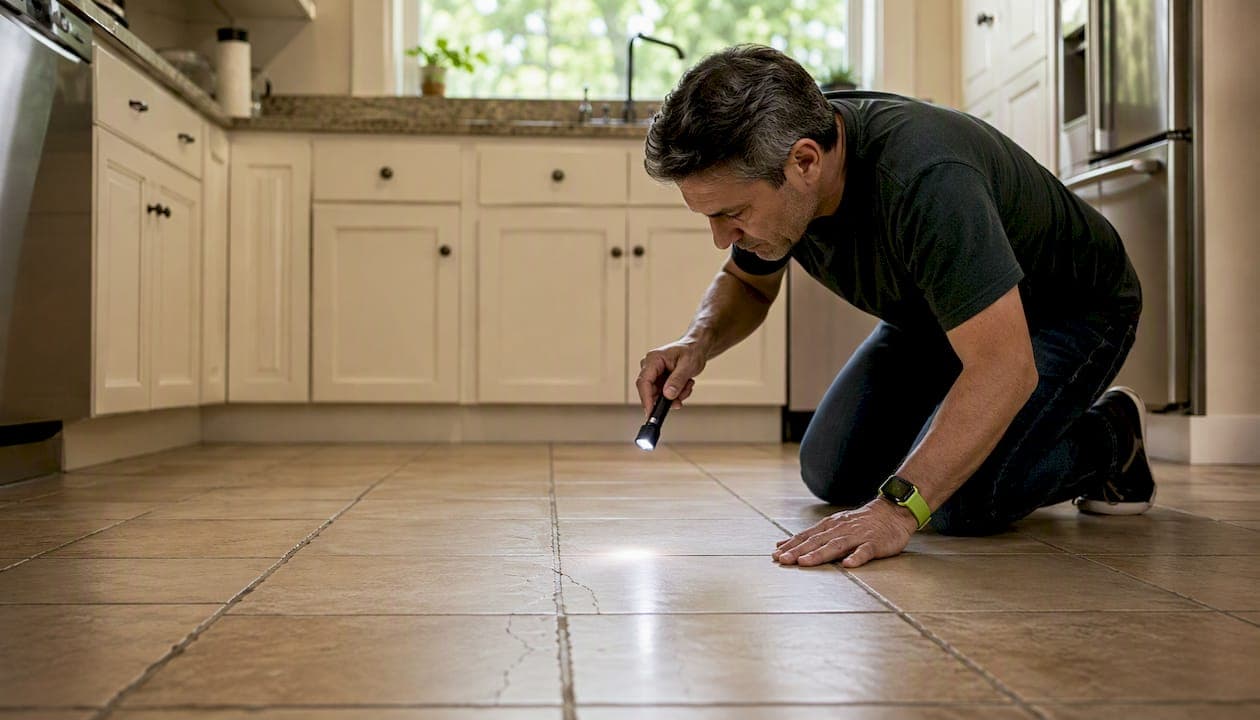
Grout cracks because it is rigid and cannot absorb movement. When a subfloor flexes, a building settles, or expansion joints are missing, stress concentrates at the grout joint until it fails. The crack you see is almost always a symptom of something happening underneath, not a sign you bought bad grout.
Before you reach for a tube of premixed grout, do two things: look at the crack pattern, and tap the surrounding tiles with a coin or knuckle. A hollow sound means the tile has debonded from the substrate. That changes everything about your repair path.
Quick triage:
- Isolated hairline crack, tile sounds solid: cosmetic issue, DIY regrout is appropriate.
- Repeated cracks at regular intervals: missing or filled-over expansion joints, regrout alone will fail again.
- Hollow-sounding tiles near the cracks: tile has debonded, re-bonding required before any regrout.
- Cracks running diagonally across multiple tiles, or doors sticking nearby: possible structural movement, call a professional.
The Tile Council of North America (TCNA) and professional installers consistently make the same point: re-grouting without fixing the root cause guarantees the cracks come back.
Table of Contents
- How to read crack patterns before you do anything else
- The real causes of cracked grout, ranked by how often they show up
- How to diagnose whether your cracked grout is cosmetic or structural
- Materials and installation practices that prevent grout cracking
- Step-by-step DIY repair for minor grout cracks
- When you should stop and call a tile professional
- What TCNA and manufacturer standards actually say
- Key Takeaways
- The fix that actually sticks
- Useful sources and further reading
How to read crack patterns before you do anything else
The shape and location of a crack tells you more than the crack itself. Get close, take a photo, and compare what you see against these common patterns.

Hairline cracks in a single joint are the most common and least alarming. They usually appear in older installations where the grout has simply dried out and shrunk slightly over years of temperature cycling. If the tile on either side sounds solid when tapped, this is a cosmetic problem.
Repeated hairlines at regular spacing are a different story. Straight, repeated linear cracks that form at regular intervals point to omitted or incorrectly filled expansion joints and cannot be permanently fixed with regrout alone. The grout is absorbing thermal movement that a flexible joint should be handling.
Diagonal or stair-step cracks that cross tile corners or run at 45 degrees suggest structural settlement. Thermal cracks tend to run in straight lines perpendicular to the longest tile dimension; settlement cracks follow a stair-step pattern. If you see stair-stepping, check whether interior doors are sticking or whether drywall cracks have appeared nearby.
Crumbling or powdering grout that falls out when you press it with a fingernail points to a mix problem: too much water was added during installation, or the grout was never properly cured.
The tap test
Knock on each tile near the cracked joint with a coin or your knuckle. A solid tile returns a dense thud. A debonded tile sounds hollow or produces a slight click. A hollow-sounding tile indicates debonding from the substrate, meaning the grout is a symptom, not the root problem. Mark every hollow tile with a piece of painter's tape before you do anything else. That map tells you the true scope of the repair and gives a contractor a clear picture if you decide to call one.
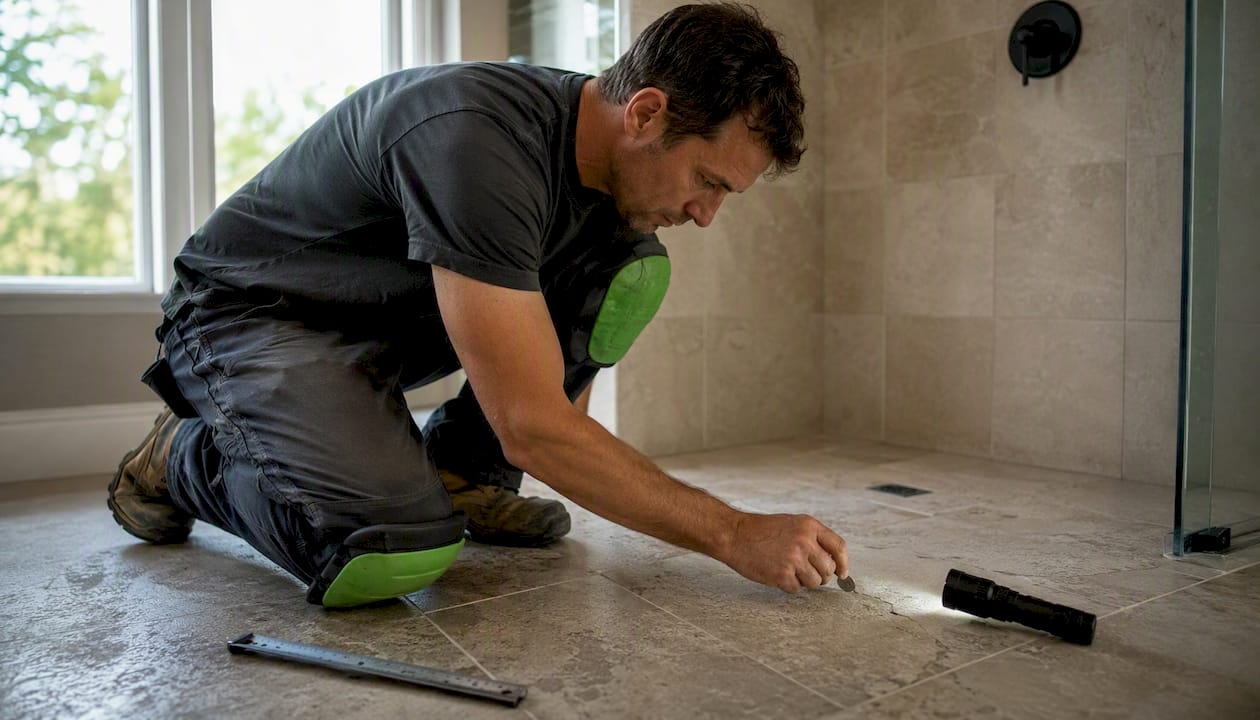
Pro Tip: Photograph the crack pattern from directly above in good light, then photograph the tap-test map with painter's tape in place. Store both in a phone album labeled with the date. If cracks return after repair, that dated record tells a contractor exactly how fast the problem is progressing.
The real causes of cracked grout, ranked by how often they show up
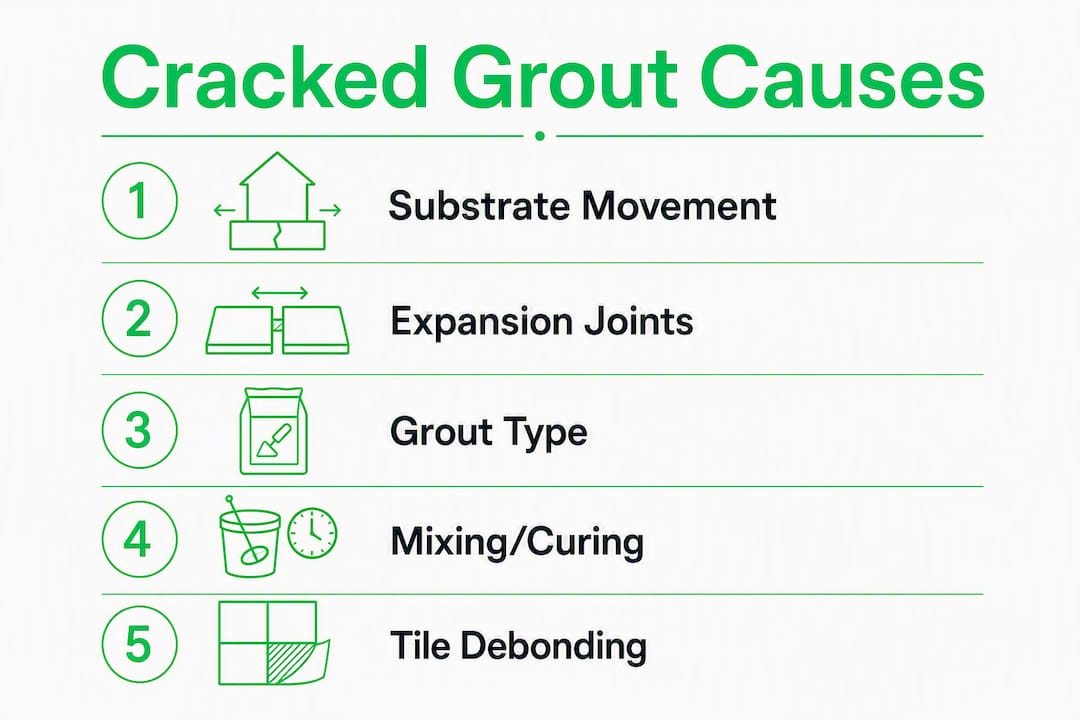
1. Substrate movement and subfloor deflection
This is the most common serious cause. A subfloor that deflects more than L/360 under load will cause grout cracks regardless of grout brand. L/360 means the floor can deflect no more than the span divided by 360 under a standard load. A 10-foot span, for example, allows no more than about one-third of an inch of flex. Wood subfloors, especially older ones with undersized joists, routinely exceed this limit. Every time someone walks across the floor, the subfloor moves slightly, and the rigid grout absorbs that stress until it cracks.
2. Missing or filled-over expansion joints
The TCNA requires expansion joints at all changes of plane and at maximum intervals of 8–12 feet for interior installations and 8–10 feet for exterior installations. These joints exist to let the tile assembly breathe as temperatures change. When an installer fills them with grout instead of flexible sealant, there is nowhere for that movement to go. The grout cracks, often in a straight line, and it will keep cracking after every repair until the joint is properly converted to a flexible one.
3. Wrong grout type for the joint width
Sanded grout should be avoided in joints narrower than 1/8 inch. The sand particles in sanded grout are too large to pack properly into a narrow joint, leaving voids that crack under the slightest stress. Conversely, unsanded grout in a wide joint shrinks too much as it cures. Using the right product for the joint width is not optional.
4. Improper mixing or curing
Adding extra water to grout during mixing weakens the final structure and can lead to pinholing and premature failure. The excess water evaporates as the grout cures, leaving microscopic voids throughout the joint. Those voids become cracks. Delayed cracking from installation mistakes can appear 2–5 years after the tile was set, which is why homeowners are often confused: the tile looked fine for years before the problems started.
5. Tile debonding
When the adhesive bond between a tile and the substrate fails, the tile moves independently under foot traffic. Grout joints connecting a debonded tile to its neighbors crack almost immediately. The debonding itself usually traces back to insufficient adhesive coverage, a dusty or contaminated substrate, or the subfloor deflection problem described above.
6. Thermal expansion and humidity changes
All building materials expand and contract with temperature and humidity. Effects of humidity on grout are especially pronounced in bathrooms and kitchens, where steam and moisture cycles are frequent. Without proper expansion joints to accommodate that movement, the grout absorbs it.
7. Water infiltration, freeze-thaw, and efflorescence
Water that penetrates cracked grout on exterior or unheated surfaces freezes and expands, widening the crack with each cycle. Efflorescence, the white powdery residue that sometimes appears on grout, signals that water is moving through the tile assembly and carrying dissolved salts to the surface. Left alone, this leads to progressive grout failure and eventually substrate damage.
8. Heavy impact or point loads
Dropping something heavy on a tile, or placing furniture legs directly on a grout joint without pads, can crack grout even in a well-installed floor. These cracks are usually isolated and easy to identify by their location.
9. Age and wear
Cementitious grout is not permanent. In high-traffic areas, grout wears down over years of foot traffic, cleaning, and exposure. Sealing grout on schedule slows this process considerably, but eventually even well-maintained grout needs replacement.
How to diagnose whether your cracked grout is cosmetic or structural
Start in the room where the cracking is worst. You need good light, a coin for tapping, and about 20 minutes.
Step one: map the cracks. Walk the entire tiled area and note where cracks appear. Are they isolated to one or two joints, or do they run in a line across multiple tiles? Do they follow a straight path or a diagonal one? Isolated cracks in random locations suggest cosmetic wear or a localized installation error. Cracks that form a pattern, especially straight lines at regular spacing or diagonal runs near walls and doorways, suggest movement.
Step two: tap every tile near a crack. Work outward from the cracked joint and tap each tile. Mark hollow ones with painter's tape. Practical triage guidance groups the problem into three categories: isolated wear and hairline cracks on solid tiles (DIY regrout), localized loose tiles (remove, re-bond, then regrout), and systematic or widespread cracking (professional assessment).
Step three: check perimeter joints and transitions. Look at the joint where the tile meets the tub, wall, cabinet, or threshold. Is it grout or flexible caulk? If it is grout and it is cracked, that joint was installed incorrectly. The role of caulking at tub and shower transitions is to absorb exactly this kind of movement.
Step four: look for building-level clues. Open and close nearby doors. Check for cracks in adjacent drywall. Look at the baseboard for gaps. Any of these alongside tile cracking suggests the building itself is moving, which puts the repair firmly in professional territory.
If your checks end with solid tiles, isolated cracks, and no building-level signs, you have a cosmetic problem you can fix yourself. If you find hollow tiles, systematic linear cracks, or building movement clues, stop and call a tile professional.
Materials and installation practices that prevent grout cracking
Grout type by joint width and location
| Grout type | Recommended joint width | Best for |
|---|---|---|
| Sanded cementitious | 1/8 in. and wider | Floor tile, high-traffic areas |
| Unsanded cementitious | Up to 1/8 in. | Wall tile, polished stone, narrow joints |
| Polymer-modified | 1/8 inch and wider | Wet areas, floors with minor flex |
| Epoxy | 1/8 inch and wider | Commercial kitchens, chemical exposure, wet areas |
Polymer-modified and epoxy grouts offer better resistance to cracking from movement and moisture, making them worth the extra cost in bathrooms and kitchens.
Installation best practices checklist:
- Confirm subfloor deflection is within L/360 before setting any tile.
- Clean the substrate thoroughly; dust and residue prevent full adhesive bond.
- Apply adhesive with the correct trowel notch size for full coverage (typically 95% contact for wet areas).
- Pack grout joints fully with no voids; ensure joints are fully packed and follow the product label/TDS steps.
- Mix grout to the manufacturer's Technical Data Sheet (TDS) ratio. Do not add extra water.
- Allow tile adhesive to cure fully before grouting. Walking on tile too soon shifts tiles before the bond sets.
- Cure grout in stable temperature and humidity conditions; avoid direct sun or heating vents during cure.
- Seal cementitious grout after cure where appropriate (floors, wet areas).
Pro Tip: Before signing off on any new tile installation, check every perimeter joint and every change of plane. If you see grout where flexible sealant should be, have it corrected before the job is paid. Grout at a tub-wall transition or a floor-wall corner will crack within months.
On wood subfloors or any substrate with known flex, ask your installer about an uncoupling membrane such as Schluter DITRA. These membranes decouple the tile assembly from the subfloor, absorbing the small movements that would otherwise crack grout joints. They add cost but dramatically reduce callbacks on wood-framed floors.
Step-by-step DIY repair for minor grout cracks
This process works for isolated cracks on tiles that pass the tap test (solid, not hollow). If any tile sounds hollow, do not regrout until it is re-bonded.
Tools and materials you will need:
- Grout saw or oscillating tool with a grout-removal blade
- Shop vacuum
- Matching grout (sanded or unsanded, matched to original joint width)
- Grout float
- Bucket and sponge
- Painter's tape
- Flexible sealant (caulk) for perimeter joints
- Grout sealer (for cementitious grout)
Numbered repair steps:
- Remove failed grout. Use a grout saw or oscillating tool to cut out the cracked grout to a minimum depth of 1/8 inch. Go deeper if the grout is crumbling. Do not score the tile edges.
- Vacuum the joint. Remove all dust and debris with a shop vacuum. Any residue left in the joint will prevent the new grout from bonding.
- Confirm tile bond. Tap each tile one more time. If anything sounds hollow now that the grout is out, stop and re-bond the tile before proceeding.
- Mix grout to TDS. Follow the manufacturer's liquid-to-powder ratio exactly. Excess water reduces strength and causes pinholing; do not add more water to make the mix easier to spread.
- Pack the joint fully. Press grout into the joint with a grout float held at a 45-degree angle. Work diagonally across the joint to avoid dragging grout back out.
- Tool and clean. Once the grout has set slightly (usually 15–30 minutes, check TDS), wipe with a damp sponge in a circular motion. Rinse the sponge frequently. Avoid flooding the joint with water.
- Cure undisturbed. Keep foot traffic off the repair for the time specified on the TDS, typically 24–72 hours.
- Seal if appropriate. Once fully cured, apply a penetrating grout sealer to cementitious grout in wet areas or on floors.
For perimeter joints at tubs, showers, and floor-wall transitions, skip the grout entirely and use a color-matched flexible sealant. These joints move; grout does not. For more detail on when sealant replaces grout, the bathroom renovation guide covers sequencing and material choices in full.
Realistic cost: basic grout repair materials run $15–$40 for a small area. An oscillating tool, if you do not own one, adds $30–$80. Professional labor for the same repair typically runs $150–$400 depending on scope and region.
Pro Tip: If you are regrouting a joint that was previously hollow but has since been re-bonded, wait a full 24 hours after re-bonding before grouting. Pressing grout into a joint over fresh adhesive that has not cured can shift the tile again.
When you should stop and call a tile professional
Some problems look like grout issues but are actually structural. Attempting a DIY fix on these wastes money and can make the underlying problem harder to diagnose later.
Call a professional when you see any of these:
- Cracks return within weeks or months of a previous repair.
- Multiple adjacent tiles sound hollow when tapped.
- Linear cracks run across several tiles in a straight line, especially at regular intervals.
- Diagonal cracks appear near doorways, corners, or exterior walls.
- Grout is powdering or crumbling across a wide area, not just at one joint.
- There is visible water damage, staining, or mold behind or beneath tiles.
- Nearby doors stick or drywall cracks have appeared alongside the tile cracking.
A tile professional will typically start with an on-site diagnostic: tapping, moisture testing, and checking subfloor deflection. From there, the repair scope might include removing and resetting debonded tiles, cutting in proper expansion joints, reinforcing or sistering joists to reduce deflection, waterproofing repairs in wet areas, and full re-setting of a tile field where the substrate has failed.
Cost ranges vary widely by scope. A localized re-bond of a few tiles might run $200–$500. A full tile reset with subfloor reinforcement on a bathroom floor can reach $1,500–$4,000 or more depending on tile type, floor area, and whether waterproofing needs replacement. Getting an itemized quote before work starts is the only way to compare fairly.
What TCNA and manufacturer standards actually say
The TCNA is the primary industry authority on tile installation standards in the United States. Its guidance on expansion joints is specific: interior installations require flexible movement joints at maximum 8–12 foot intervals and at all changes of plane; exterior installations require them at 8–10 foot intervals. These are not suggestions. Installations that omit them will crack, and the TCNA's own FAQ confirms that re-grouting without fixing the underlying cause guarantees repeat failure.
Manufacturer Technical Data Sheets carry equal weight for installation quality. Every grout product has a TDS that specifies the exact liquid-to-powder mixing ratio, pot life (how long the mixed grout remains workable), minimum and maximum application temperatures, and cure time before foot traffic. Deviating from any of these parameters introduces failure risk.
Key standards to reference when speaking with an installer:
- MAPEI Grout Troubleshooting Guide: practical remedies for common grout failures, including packing depth minimums and epoxy reapplication requirements
- EPA moisture control guidance: relevant for wet areas where grout failure is accompanied by mold risk
If an installer cannot tell you which TCNA method they are following or cannot produce the TDS for the grout they plan to use, that is a red flag worth taking seriously.
Key Takeaways
Grout cracks because it is rigid and cannot absorb movement; fixing the root cause (substrate, expansion joints, or installation error) is the only repair that lasts.
| Point | Details |
|---|---|
| Tap tiles before regrouting | A hollow sound means debonding; regrout on a hollow tile will fail immediately. |
| Expansion joints are mandatory | TCNA requires flexible joints at maximum intervals of 8–12 feet for interior installations and at all changes of plane; exterior installations require them every 8–10 feet. |
| Match grout to joint width | Sanded grout in joints narrower than 1/8 in. leaves voids that crack under stress. |
| Never over-water the mix | Excess water creates internal voids; always follow the manufacturer's TDS ratio. |
| Systematic cracks need a pro | Linear cracks across multiple tiles or recurring failures after repair require professional assessment. |
The fix that actually sticks
Most homeowners who call about cracked grout have already regrouted once. Sometimes twice. The cracks came back, usually faster the second time, because the grout was replaced without addressing what caused it to fail.
The diagnostic step is not optional. Mapping cracks, tapping tiles, and checking perimeter joints takes 20 minutes and tells you whether you have a $30 DIY fix or a $2,000 structural problem. Skipping it and going straight to the grout bag is how a manageable repair turns into a recurring expense.
One thing worth saying plainly: if you find hollow tiles, stop. Document what you found with photos and call a professional. Hollow tiles mean the adhesive bond has failed, and that failure has a cause. A contractor who cannot see the original crack pattern and tap-test map has less to work with. The evidence you preserve before touching anything is genuinely useful.
For repeat failures, flexible joints at every perimeter and change of plane are not a luxury upgrade. They are the standard the TCNA has required for decades, and most cracking problems in residential tile trace back to their absence.
Useful sources and further reading
- Tile Council of North America (TCNA) — Cracked/Loose Grout FAQ: the primary US industry authority on expansion-joint rules, grout selection, and substrate standards.
- MAPEI Grout Troubleshooting Guide (PDF): manufacturer-level guidance on diagnosing and repairing grout failures, including packing depth and epoxy reapplication
- CeramicInfoSpot — Why Is My Tile Grout Cracking?: practical homeowner-facing breakdown of causes, crack patterns, and repair paths.
- EPA — Moisture Control in Your Home: relevant for wet-area grout failures where moisture infiltration and mold risk are present.
- Honestbuilders — Renovation and Handyman Services: for homeowners who have completed the diagnostic and need a professional tile or renovation assessment.

Need a professional eye on your tile? If your grout keeps cracking or your tap test turned up hollow tiles, Honestbuilders provides on-site tiling assessments and full renovation services. WhatsApp +65 9447 9696 for a free, no-obligation quote.