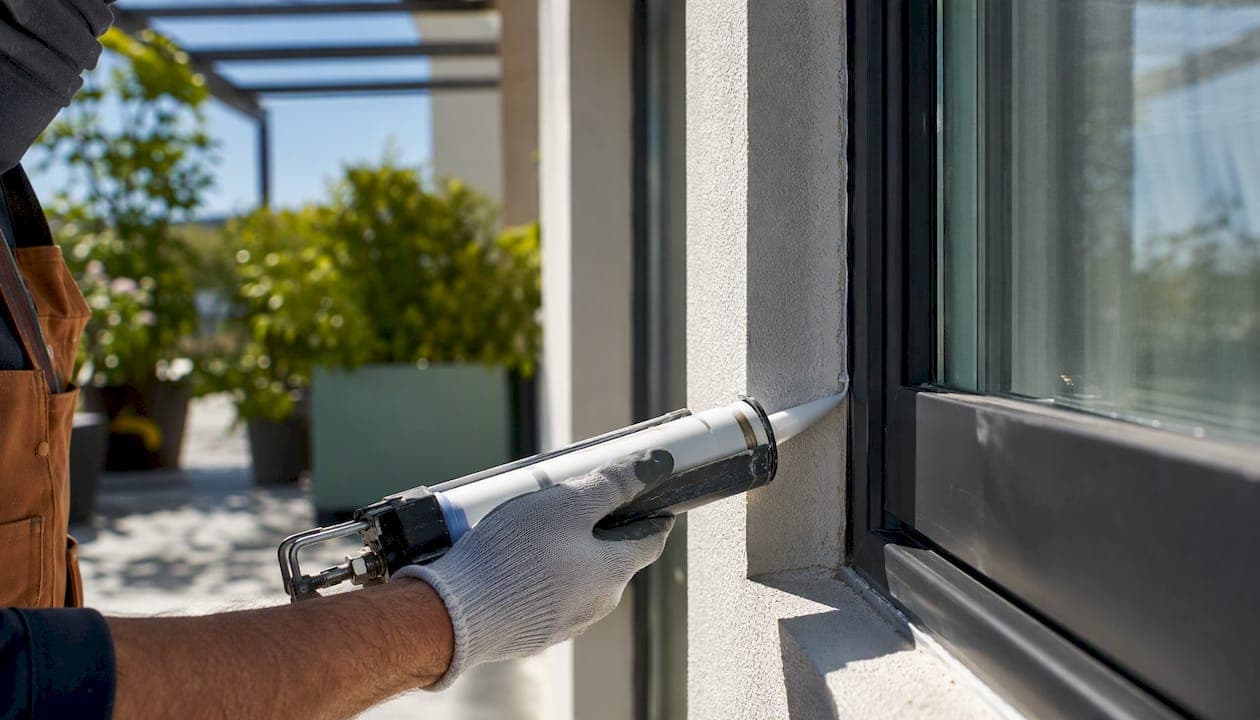
Sealants form a flexible, impermeable barrier across gaps in your home's structure, blocking water, air, dust, and insects while stretching and compressing as building materials move with temperature and humidity. That elasticity is what separates a sealant from a rigid filler: it stays bonded through seasonal cycles instead of cracking away. The ASTM C719 standard tests exactly this movement capacity, rating sealants by how much they can stretch and compress relative to their bead width. Before you buy anything, three things matter most:
- Pick the right chemistry for your substrate and exposure (silicone for wet or UV-exposed joints, acrylic for paintable interior trim, polyurethane or hybrid for demanding exterior joints).
- Maintain a 2:1 width-to-depth bead ratio, using backer rod in deep joints to prevent three-sided adhesion, per ASTM installation guidance.
- Inspect and reseal on a schedule: exterior joints annually, wet-area joints every 6–12 months.
A quick distinction before going further: sealants fill gaps flexibly; adhesives create structural bonds; caulk is a retail term that often describes lower-movement-capacity sealants used on interior trim. They are not interchangeable.
Key Takeaways
Sealants prevent far more damage than they cost, but only when the right chemistry is matched to the joint, installed correctly, and maintained on a regular schedule.
| Point | Details |
|---|---|
| Match chemistry to the job | Silicone for wet and UV-exposed joints; acrylic for paintable interior trim; polyurethane or hybrid for heavy exterior joints. |
| Respect the 2:1 bead ratio | Joint width should be twice the depth; use backer rod in deep joints to prevent three-sided adhesion failure. |
| Check ASTM C719 movement rating | Confirm the product's rated movement capacity covers your joint's actual seasonal range before buying. |
| Inspect and reseal on schedule | Exterior joints annually; wet areas every 6–12 months; always after storms or visible cracking. |
| Honestbuilders for complex jobs | On-site diagnosis, full removal and replacement with correct joint design, and a workmanship warranty for exterior, inaccessible, or substrate-damaged repairs. |
Table of Contents
- What does a sealant actually do for your home?
- Sealant vs. adhesive vs. caulk: which one does the job?
- Which sealant chemistry fits your repair?
- What performance specs should you check before buying?
- How do you choose the right sealant for a specific job?
- How to apply sealant correctly
- How do you know when a seal has failed, and when should you reseal?
- Safety, VOCs, and handling precautions
- Why proper sealing matters for your whole building envelope
- When DIY sealing is fine and when it isn't
- Honestbuilders handles the sealant jobs that go beyond a tube and a caulk gun
- Sources
What does a sealant actually do for your home?
A sealant is a paste-like material that cures into an elastomeric bead, meaning it stays rubbery rather than hardening into a rigid mass. HB Fuller describes sealants as flexible, gap-filling materials that form impermeable barriers, with many modern formulations adding secondary functions like sound dampening, intumescent fire protection, or antimicrobial properties depending on the polymer used.
The everyday applications are everywhere once you start looking: the bead around your tub, the perimeter of every window and door, roof penetrations where pipes exit, siding joints, tile edges, and concrete expansion joints. Each of those locations is a gap where two different materials meet and move independently.
Why does it matter if those gaps go unsealed or if the sealant fails? Hidden moisture damage is the real cost. Water that gets behind siding or under a tile edge doesn't announce itself until there's visible mold, rot in the framing, or a ceiling stain. Drafts through failed window perimeter seals raise heating and cooling bills. Insects find their way through gaps that look too small to matter. A properly sealed joint costs a few dollars and an hour; the repairs it prevents can run into thousands.
Pro Tip: The single most common installation mistake is pressing sealant all the way into a corner so it bonds to three surfaces at once. When the joint moves, the bead can't stretch because it's anchored on three sides instead of two. A backer rod inserted before you apply the sealant limits the bead depth, creates the correct two-sided adhesion, and gives the cured bead room to flex.
Sealant vs. adhesive vs. caulk: which one does the job?
These three terms get used interchangeably at hardware stores, but they describe fundamentally different products. Choosing the wrong category is one of the fastest ways to guarantee a repair that fails within a year.
| Category | Primary function | Movement capacity | Paintable | Common home uses |
|---|---|---|---|---|
| Sealant | Flexible gap-filling and environmental separation | High (significant movement) | Depends on chemistry | Window perimeters, wet areas, exterior joints |
| Adhesive | Structural bonding | Low to none | Rarely | Mounting fixtures, bonding panels, structural assembly |
| Caulk (retail term) | Interior gap-filling, lower movement | Low to moderate | Usually yes | Trim, baseboards, paintable interior joints |
The decision comes down to a short checklist:
- Is the joint load-bearing? If yes, you need an adhesive, not a sealant.
- How much will the joint move? Window frames and exterior joints move significantly with temperature; interior trim moves very little.
- Will it be exposed to water or UV? Wet areas and exterior joints need a sealant rated for those conditions.
- Does it need to be painted? Silicone sealants typically can't be painted; acrylic-based products can.
- What substrates are involved? Not every sealant bonds to every material without a primer.
Matching modulus and movement rating to the joint is more important than picking the "strongest" product. A sealant that's too rigid for a moving joint will fail just as fast as one that's too soft.
Which sealant chemistry fits your repair?
The chemistry determines almost everything: how long it lasts, what it sticks to, whether you can paint it, and how it handles water and UV. Here's how the main types break down for typical home repairs.
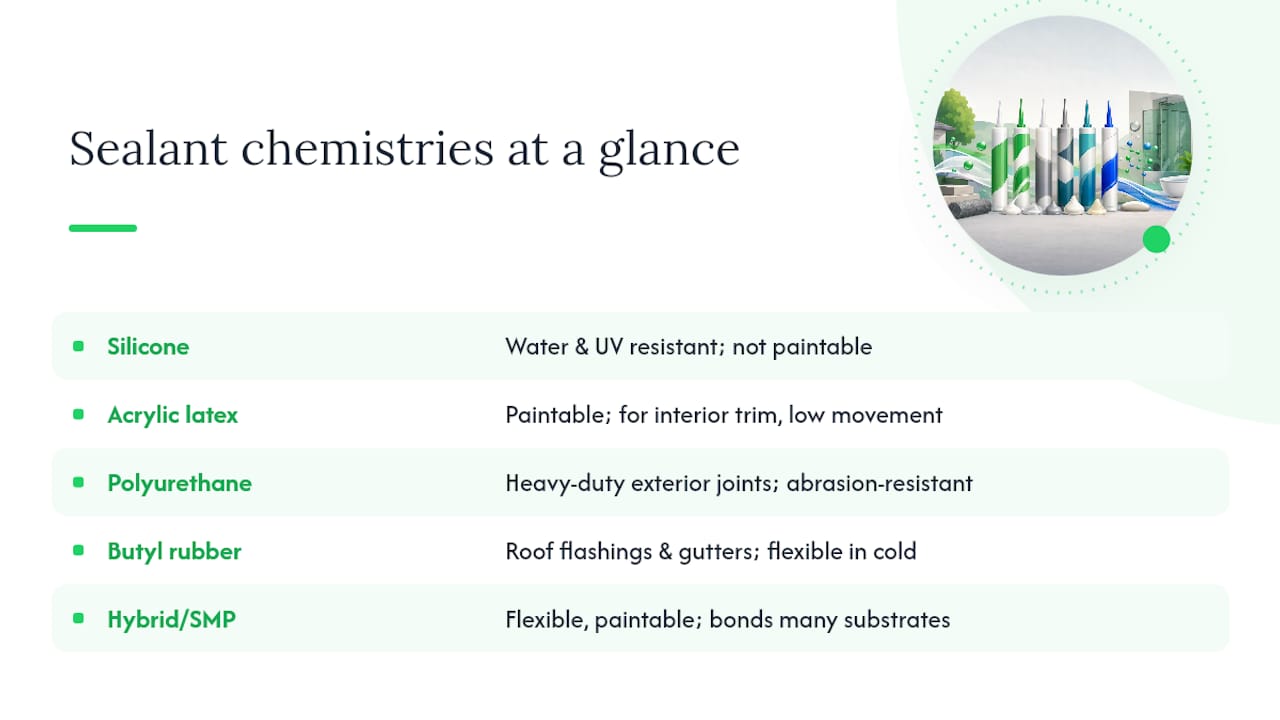
Silicone is the go-to for showers, tubs, and any exterior joint with direct UV or water exposure. It offers superior water and UV resistance and handles significant joint movement, but it won't accept paint and can be tricky to tool neatly. Silicone's movement tolerance and moisture resistance make it the standard recommendation for moist areas and exposed exterior joints.
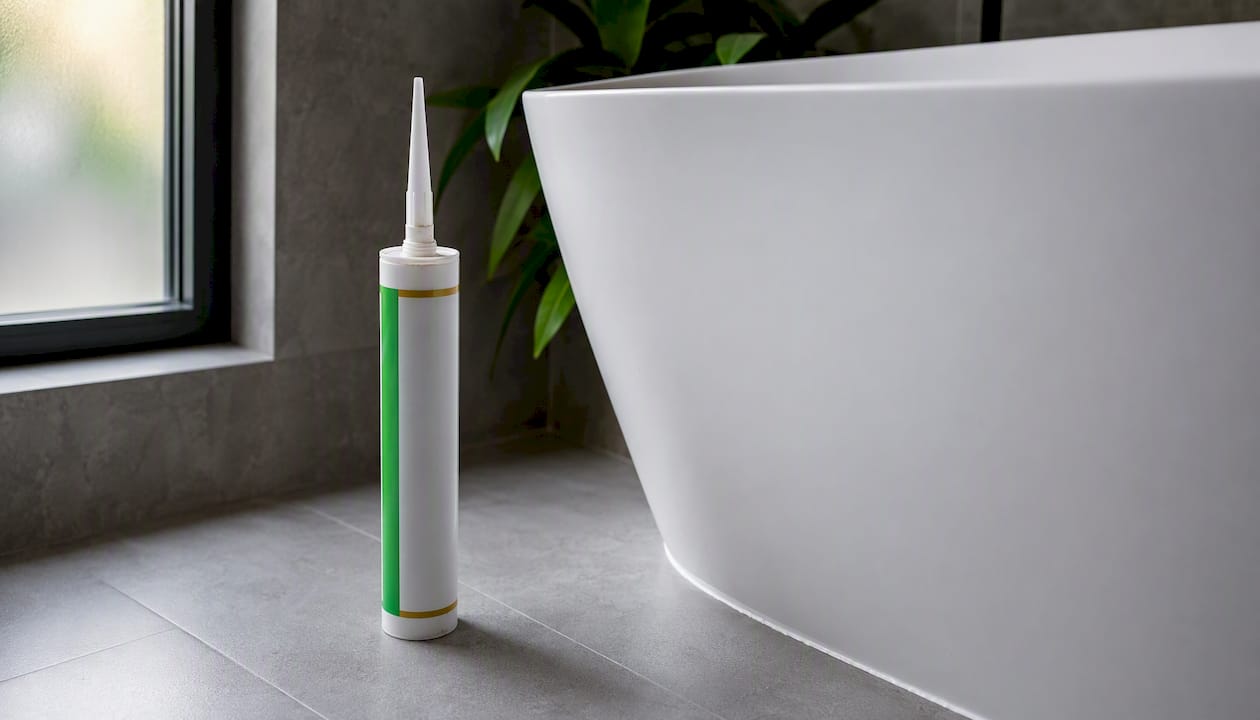
Acrylic latex is the paintable option. It adheres to wood, drywall, and most interior substrates, cleans up with water, and accepts paint once cured. The trade-off is lower elasticity, so it belongs on interior trim and gaps that don't move much, not on window perimeters or exterior joints that cycle through large temperature swings.
Polyurethane handles heavy-duty exterior joints where abrasion resistance and weather durability matter: driveways, concrete expansion joints, and exterior wood-to-masonry transitions. It's tougher than silicone in high-traffic areas but requires solvent cleanup and more careful handling.
Butyl rubber is the traditional choice for roofing flashings, gutters, and driveway joints. It stays flexible in cold temperatures and bonds well to metal and asphalt, but it's messy to work with and not ideal for visible interior applications.
Hybrid/silyl-modified polymer (SMP) sealants combine silicone-like flexibility with the paintability and adhesion range of polyurethane. They bond to wood, metal, PVC, concrete, and tile without a primer in many cases, which makes them a strong choice when a single product needs to span multiple substrates on a complex exterior repair.
A few compatibility notes worth keeping in mind: silicone generally doesn't bond well to porous substrates like bare wood without a primer; polyurethane can discolor light-colored surfaces if not fully cured before UV exposure; and some chemistries are incompatible with each other, so removing old sealant completely before reapplying a different type is not optional.
What performance specs should you check before buying?
The label on a sealant tube is marketing. The product data sheet is what actually tells you whether it will hold up.
Movement rating is the most important number. ASTM C719 is the standard test method for this.
Modulus describes stiffness. A high-modulus sealant resists deformation, which sounds good but means it transmits stress to the bond line when the joint moves. Low-modulus sealants stretch more easily and are better suited to joints with frequent or large movement. Matching modulus to expected movement is a more reliable predictor of longevity than brand reputation alone.
Adhesion claims on the label should list specific substrates. If your substrate isn't listed, check whether the manufacturer recommends a primer. An adhesion test on a small, inconspicuous area before committing to the full joint is always worth the ten minutes.
Cure time and application temperature matter more than most homeowners realize. Applying a sealant outside its recommended temperature range, or tooling it before the skin forms, compromises the bond. Most products specify a range of roughly 40°F–100°F (4°C–38°C) for application.
Surveys documented in the TechLine technical brief found that roughly 55% of sealant installations failed within 10 years when poorly specified or installed. The chemistry matters, but installation practice and correct product selection matter just as much.
UV and water resistance ratings determine exterior suitability. For any joint that sees direct sun or rain, confirm the product data sheet lists tested UV resistance, not just a marketing claim.
How do you choose the right sealant for a specific job?
Work through this decision flow before you go to the store:
- Identify the joint type and expected movement. Expansion joint in concrete? Window perimeter? Interior trim? Each has a different movement profile.
- List the substrates on both sides. Wood, PVC, aluminum, concrete, tile, and drywall all have different adhesion requirements.
- Assess exposure. Wet, UV-exposed, chemical exposure (cleaning products near a tub), or sheltered interior?
- Match chemistry and movement rating. Use the chemistry guide above and confirm the product's ASTM C719 movement rating covers your joint's expected range.
- Check paintability, cure time, and VOC level if you're working indoors or need to paint over the bead.
For exterior joints, wet areas, and any location where resealing is difficult or disruptive, spending more on silicone, polyurethane, or a hybrid is worth it. The FHWA joint sealant brief makes the lifecycle cost argument clearly: correct material selection considering joint type, climate, and expected movement produces far better long-term performance than choosing the cheapest available product.
For interior trim and gaps that don't move, acrylic latex is perfectly adequate and much easier to work with.
Pro Tip: Before committing to a full joint, apply a small test bead on a hidden section of the same substrate, let it cure fully, and try to peel it off. If it peels cleanly without tearing, you need a primer or a different product. Check the manufacturer's data sheet for the recommended joint geometry and movement rating before you open the tube.
How to apply sealant correctly
Getting the chemistry right and then installing it badly is surprisingly common. Here's what you need and how to do it properly.
Tools and supplies:
- Caulk gun (a smooth-rod gun gives better bead control than a ratchet type)
- Utility knife and sealant removal tool
- Backer rod (closed-cell polyethylene foam, sized slightly larger than the joint width)
- Isopropyl alcohol or manufacturer-recommended cleaner
- Masking tape
- Tooling spatula or a wetted finger
- Nitrile gloves and eye protection
- Clean rags
Step-by-step installation:
- Remove all old sealant. Use a utility knife and sealant removal tool to cut and pull out the existing bead. Don't layer new product over old; full removal is required for proper adhesion.
- Clean and dry the joint. Wipe both sides with isopropyl alcohol or the manufacturer's recommended solvent. Let it dry completely. Any moisture, oil, or residue will compromise adhesion.
- Insert backer rod. For joints deeper than half their width, press backer rod into the joint until it sits at the correct depth. The goal is a bead that's twice as wide as it is deep (the 2:1 ratio), with the sealant bonding only to the two facing surfaces, not the back of the joint.
- Apply masking tape on both sides of the joint for a clean edge.
- Cut the nozzle at a 45° angle to a diameter slightly smaller than the joint width. Apply steady, consistent pressure as you draw the gun along the joint in one pass.
- Tool the bead immediately with a wetted spatula or finger, pressing it into contact with both substrates and creating a slightly concave profile. This ensures full contact and the correct hourglass shape that allows flexing.
- Remove the tape before the skin forms.
- Allow full cure per the product data sheet before exposing the joint to water or movement. Skin-over time and full cure time are different; don't confuse them.
Apply when temperatures are within the manufacturer's specified range and when the joint is neither at its maximum compression nor maximum extension. Installing in extreme cold when a joint is fully closed means that the sealant will be under tension as soon as temperatures rise.
For a 1/2-inch joint, use 5/8-inch backer rod. This compression creates a seal against the back of the joint and keeps the backer rod from moving while you apply the sealant.*
For bathroom-specific sealing work, the role of waterproofing in bathroom renovation covers how sealants fit into the broader wet-work system.
How do you know when a seal has failed, and when should you reseal?
Sealant doesn't last forever, and knowing what failure looks like saves you from discovering it through water damage.
Common failure modes:
- Adhesion loss (delamination): The bead peels away from one or both substrates. Usually caused by poor surface prep, wrong chemistry, or three-sided adhesion.
- Cohesive failure: The bead tears through its own body rather than at the bond line. Typically means the joint moved beyond the sealant's rated capacity, or the modulus was too high.
- UV degradation: Chalking, cracking, or hardening on exterior joints exposed to direct sun. Silicone resists this well; acrylic does not.
- Three-sided adhesion failure: The bead cracks down the center because it was bonded to the back of the joint and couldn't flex. This is the backer rod problem described earlier.
- Mold growth on the bead surface: Common in wet areas with poor ventilation; sometimes a sign the sealant has absorbed moisture or the joint design traps water.
Maintenance schedule:
- Exterior joints: visual inspection once a year, ideally in spring after winter thermal cycling.
- Wet areas (tubs, showers, sinks): every 6–12 months, or immediately if you see any gap, discoloration, or mold at the bead edge.
- After storms, significant temperature swings, or any visible cracking: inspect immediately.
When to replace vs. patch: If the sealant has lost adhesion or the substrate underneath shows contamination, staining, or damage, remove and replace the entire bead. A thin topcoat of new sealant over failed old sealant is a temporary fix at best. When you see recurring leaks after two DIY attempts, visible substrate damage, or mold that returns within weeks of cleaning, those are signs to call a professional rather than reach for another tube.
For more on diagnosing tile and grout failures that often accompany sealant problems, why grout lines crack in tile covers the related failure patterns.
Safety, VOCs, and handling precautions
Most sealants are safe to use with basic precautions, but a few chemistry-specific risks are worth knowing before you open the tube.
- Ventilate the work area. Open windows and run a fan when working indoors. Solvent-based products and some polyurethane sealants release fumes during application and early cure that can cause headaches or respiratory irritation in enclosed spaces.
- Wear nitrile gloves and eye protection. Uncured sealant, especially silicone and polyurethane, is difficult to remove from skin and can cause sensitization with repeated exposure. Some polyurethane formulations contain isocyanates, which are respiratory sensitizers.
- Choose low-VOC formulations for indoor work. Check the product's VOC rating and compare it against your local air quality regulations, especially if children, elderly occupants, or anyone with respiratory conditions will be in the space during or shortly after application. The SWRI technical bulletin on sealant types notes that manufacturers provide specific cure and application temperature ranges that also affect off-gassing rates.
- Clean tools with the manufacturer-recommended solvent. Never pour solvent down a household drain. For small quantities, let solvent-soaked rags dry completely before disposal; for larger quantities, follow local hazardous-waste disposal rules.
- Confined spaces and complex substrate remediation (removing mold-contaminated substrate, working in crawl spaces or behind walls) warrant professional handling, not a DIY tube of sealant.
Why proper sealing matters for your whole building envelope
A single failed joint rarely stays a single problem. Building-science research treats the building envelope as an integrated system, and a breach at one point tends to drive moisture into adjacent assemblies where it's invisible until the damage is significant.
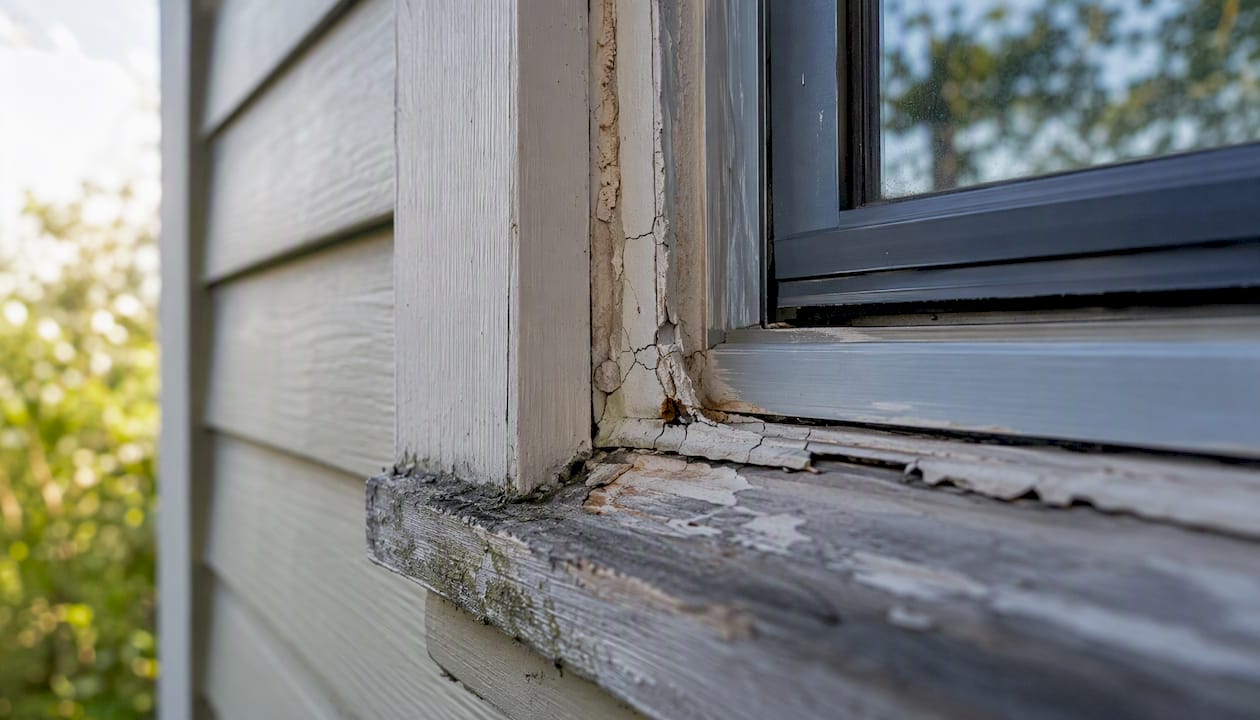
The sequence is predictable: a failed exterior window perimeter seal lets water track behind the casing, where it saturates the rough framing. The framing stays wet because there's no drying path. Within one to three seasons, mold establishes in the wall cavity and the structural members begin to soften. By the time a homeowner notices a stain on the interior drywall or a soft spot in the sill, the repair has grown from a $15 tube of sealant to a multi-thousand-dollar framing and drywall replacement.
The FHWA joint sealant brief documents the same principle in structural applications: correct joint sealing extends service life by limiting water infiltration and related deterioration, and material selection must account for joint type, climate, substrate compatibility, and expected movement. The same logic applies directly to residential construction.
The TechLine brief data on the roughly 55% failure rate within 10 years for poorly installed sealants underscores that installation quality and product selection are inseparable from long-term performance. Correct joint geometry, the 2:1 width-to-depth ratio, and backer rod use aren't optional refinements; they're the difference between a seal that lasts a decade and one that fails in two winters.
When DIY sealing is fine and when it isn't
Small, accessible, well-ventilated sealing jobs are genuinely good DIY territory. Recaulking a tub surround, resealing an interior window, or touching up a cracked bead on a baseboard takes basic tools, a couple of hours, and the right product. The skills are learnable, and the stakes of a minor mistake are low.
The calculus changes when the joint is exterior and inaccessible, when there's already evidence of substrate damage, or when the sealing work needs to coordinate with waterproofing, electrical penetrations, or structural repairs. Those jobs benefit from professional diagnosis and installation, not because the sealant itself is complicated, but because the surrounding conditions require judgment that comes from doing this work repeatedly across many building types.
Workmanship warranties matter here too. A professional who stands behind their installation gives you recourse if the seal fails prematurely. A workmanship warranty covers the installation quality, not just the material, which is the distinction that protects you when a joint fails at year two instead of year ten.
Honestbuilders handles the sealant jobs that go beyond a tube and a caulk gun

When a failed seal has already let water into the substrate, or when the joint runs along an exterior wall that requires staging, surface remediation, and coordination with other trades, the repair is no longer a Saturday afternoon project. Honestbuilders provides on-site diagnosis, full sealant removal and replacement with correct joint design (backer rod, proper bead geometry, substrate prep), and a workmanship warranty on every job. No hidden charges, no runaround.
If you're dealing with recurring leaks after DIY attempts, visible damage behind a failed seal, or a large exterior resealing project on an HDB, condo, or landed property, get a professional assessment before the damage compounds. Request a free quote from Honestbuilders or WhatsApp +65 9447 9696 to book an on-site inspection.
Sources
- What is a Sealant and Why Does It Matter?
- TechLine — Making Building Sealants Last
- Adhesive vs Sealant | Which to Use for Home Repairs?
- Joint sealants technical brief (FHWA)
- Sealants — use cases and chemistries (NCBI / book chapter)